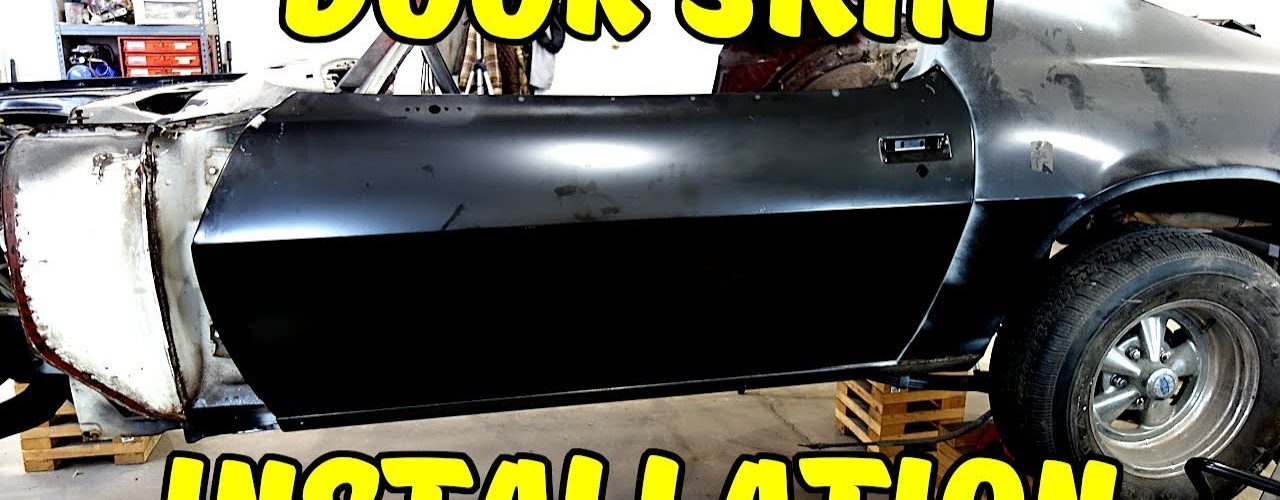
Does your door skin have rust issues or dents that are too large to fix? We are going to show you how to replace the door skin on our 1971 Camaro RS/SS project. The tools and techniques used here are similar for most door skins.
Tools & Materials
- 4-1/2 Inch Angle Grinder
- Cut Off Wheel
- Grinding Wheel or Flap Disc
- Air Hammer with Flat Chisel
- Angle Die grinder
- 2″ Roloc Sanding Discs
- 2″ Roloc Course Conditioning Discs
- 3M Red Scotch Brite/Scuff Pads
- 3M 08115 Panel Bonding Adhesive
- 3M 04274 NVH Dampening Material
- COX M200LVMR 100 ml. x 100 ml. Cartridge Multi Ratio Low Viscosity Manual Epoxy Applicator
- Design Engineering Boom Mat Spray-on Sound Deadening
- Door Skin Hammer
- Rubber Heel Dolly
- Welder
- Auto Body Work Stand
- Wax & Grease Remover
- Epoxy Primer
Removal of the Old Skin
Door skin removal is fairly straightforward as long as you have the correct tools. At first, you may think that you need to unfold the door skin, but it turns out that it’s easier to grind the edge of the fold to split the metal.
With your 4 1/2 inch angle grinder equipped with a grinding wheel or flap disc, begin grinding the door skin fold until you see the metal separate. Continue around the door skin, being careful not to grind through the door shell flanges. A flat bar or scraper can be used to help separate the skin by inserting the flat bar between the door shell flange and the skin and then using a hammer to help it along. Don’t insert it between the fold and the door shell because you’ll be fighting spot welds. Note that this only works after you have used the grinder to remove the majority of the door skin edge.
Next you’ll need to remove the tack welds along the top of the door. This can be done using the cut off wheel on your grinder.
Finally, the majority of the skin can now be removed. In my case, I had to really pull up on the skin to separate it from the globs of seam sealer that were used to sturdy up the skin.
Door Shell Inspection and Repair
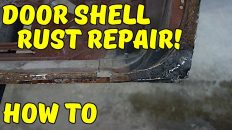
With the old skin removed, it’s now time to inspect the door shell. Here you’ll be looking for impact damage and rust issues. If your door shell needs rust repair, check out our Door Shell Rust Repair post which has a video that goes in depth. A door shell that was in an accident may need to be replaced.
Door Shell Preparation
Begin by removing the remaining pieces of the door skin on the back side of the door. An air hammer can be used to separate the pieces from the spot welds. once the remaining pieces are removed, use the die grinder equipped with the 2″ roloc sanding discs to remove what’s left of the spot welds.
Now focus on removing the rust on both sides of the door shell flanges. You can use a combination of sanding discs, conditioning discs, and wire wheels to accomplish this. Use a wire wheel to clean out rust pits. Scuff the entire door shell with a 3M red scotch brite pad.
Once the rust is removed you can direct your attention to painting the door shell with epoxy primer. If you are using 3M 08115 Panel Bonding Adhesive like we are here, tape off the outer flanges so they stay bare. The adhesive has corrosion protection mixed into it and requires bare metal for a great bond. The flanges on the interior side of the door should be epoxied. Wipe down both sides of the door shell with wax and grease remover until you no longer see dirt on the towel.
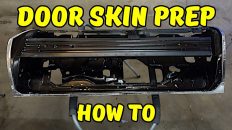
Finally spray one to two coats of epoxy primer on the door shell. Check out our Door Shell & Door Skin Preparation post for a video on this process.
Door Skin Preparation
Inspect the e-coating on the back side of the door skin. If it appears to be in good shape you are good to go. If it’s questionable, you’ll need to remove it and apply an epoxy primer.
The Camaro door skin has a mounting bracket for the mirror that must be moved over to the new door skin. Go ahead and remove the bracket from the old skin and plug weld it on to the new skin. Check out our post that covers this in depth.
Go ahead and scuff the back side of door skin, including the fold area with a red scotch brite pad. Clean the back side of the door skin with wax and grease remover after scuffing.
Tape off the fold area, about 1.5 to 2 inches. Shake the sound deadener material for at least one minute and spray multiple coats on the door skin, following the instructions on the can. Remove the tape immediately after you have finished spraying the sound deadener. I used two cans on one door skin. Let the sound deadener cure before going any further.
Clean the fold area with wax and grease remover one more time. The 3M 08115 Panel Bonding Adhesive instructions only require the door skin mating surface to be scuffed.
Check out our Door Shell & Door Skin Preparation post for a video on this process.
Door Skin Installation
Test fit the door skin on the door shell before applying any adhesive. Take a look around the door and make sure everything looks good. Check that your style lines on the door skin match up to the style lines on the door shell. Also verify that your window felt/trim mounting areas are the same distance from the top of the skin as the original skin. Also take a look at the mirror bracket and make sure it’s not hung up on anything.
When you are satisfied with the door skin fitment, remove the skin and wipe down the door shell flange and door skin fold once more with wax and grease remover.
Set the door skin in the work stand. Go around the perimeter and lay down a quarter inch bead of 3M Panel Bonding Adhesive. Next go around the door shell flange and do the same thing. Use a spreader or acid brush to spread the adhesive all over the door flange, covering all exposed metal. Apply a second bead of adhesive to the flange a quarter inch from the inside of door. The bead is important to get the squeeze out to seal the door up water tight. Finally, drop the door shell onto the door skin and position it as needed. Add some clamps to the door to hold the shell and skin in place.
Now grab your door skin hammer and your rubber heel dolly and begin working your way around the door skin. Do not try to hammer the entire fold down at one time. Take the fold down about an eighth of an inch each pass until it’s almost all the way down. Flip the door over and finish it off.
Finally fit the door to the car and tweak it as needed. You have a 90 minute work window with the adhesive. Put the tack welds back along the top of the door after you have it where you want it. You may also need to add some clamps while the adhesive cures.
After the car is painted, spray some cavity wax in the doors.
2 comments