We’d all love to own an automotive rotisserie, but sometimes we can’t due to budget or space. A decent automotive rotisserie costs between $1,000 and $2,000. Building your own automotive rotisserie costs around $300-$500 to do it right, and I don’t mean using Harbor Freight engine stands. For us weekend warriors out there, we have to consider where we are going to store the automotive rotisserie when it’s not in use. I have this issue now with my engine stands. They are piled up in a corner somewhere. So what other options do we have to get our cars flipped over to deal with the undercarriage? Say hello to the wooden tip over jig! It sometimes goes by the names of wooden rotisserie, redneck rotisserie, and rollover jig. If you’d rather build a steel rotisserie, check out these detailed free plans from Red Wing Steel Works.
Wooden Tip Over Jig Materials
This section lists out all of the items that are required to build the wooden tip over jig shown in this post. It’s common that homeowners have some of these materials laying around, making this even cheaper. The prices listed are what I paid at Lowes in October 2019. Some items can be swapped out for cheaper alternatives. For example, the mending plates can be swapped out for plywood gussets and the bolts don’t need to be galvanized.
| Item | Item Price | Quantity | Total Price |
| 2″ x 6″ x 10′ | $6.22 | 2 | $12.44 |
| 2″ x 4″ x 8′ | $2.85 | 8 | $22.80 |
| 4′ x 4′ x 3/4″ plywood (pine) | $20.40 | 1 | $20.40 |
| 4″ x 4″ x 8′ | $7.77 | 1 | $7.77 |
| 1/2″ x 5″ galvanized carriage bolts | $2.51 | 12 | $30.12 |
| 1/2″ x 8″ galvanized carriage bolts | $2.89 | 4 | $11.56 |
| 1/2″ galvanized round washer | $0.36 | 16 | $5.76 |
| 1/2″ galvanized nut | $0.41 | 16 | $6.56 |
| 5/8″ x 5″ – 11 zinc plated hex head bolts | $2.08 | 2 | $4.16 |
| 5/8″ zinc plated flat washer | $0.37 | 2 | $0.74 |
| 2″ x 4″ mending plates | $0.88 | 26 | $22.88 |
| 1-lb 2″ deck screws | $8.98 | 1 | $8.98 |
| Total | – | – | $154.17 |
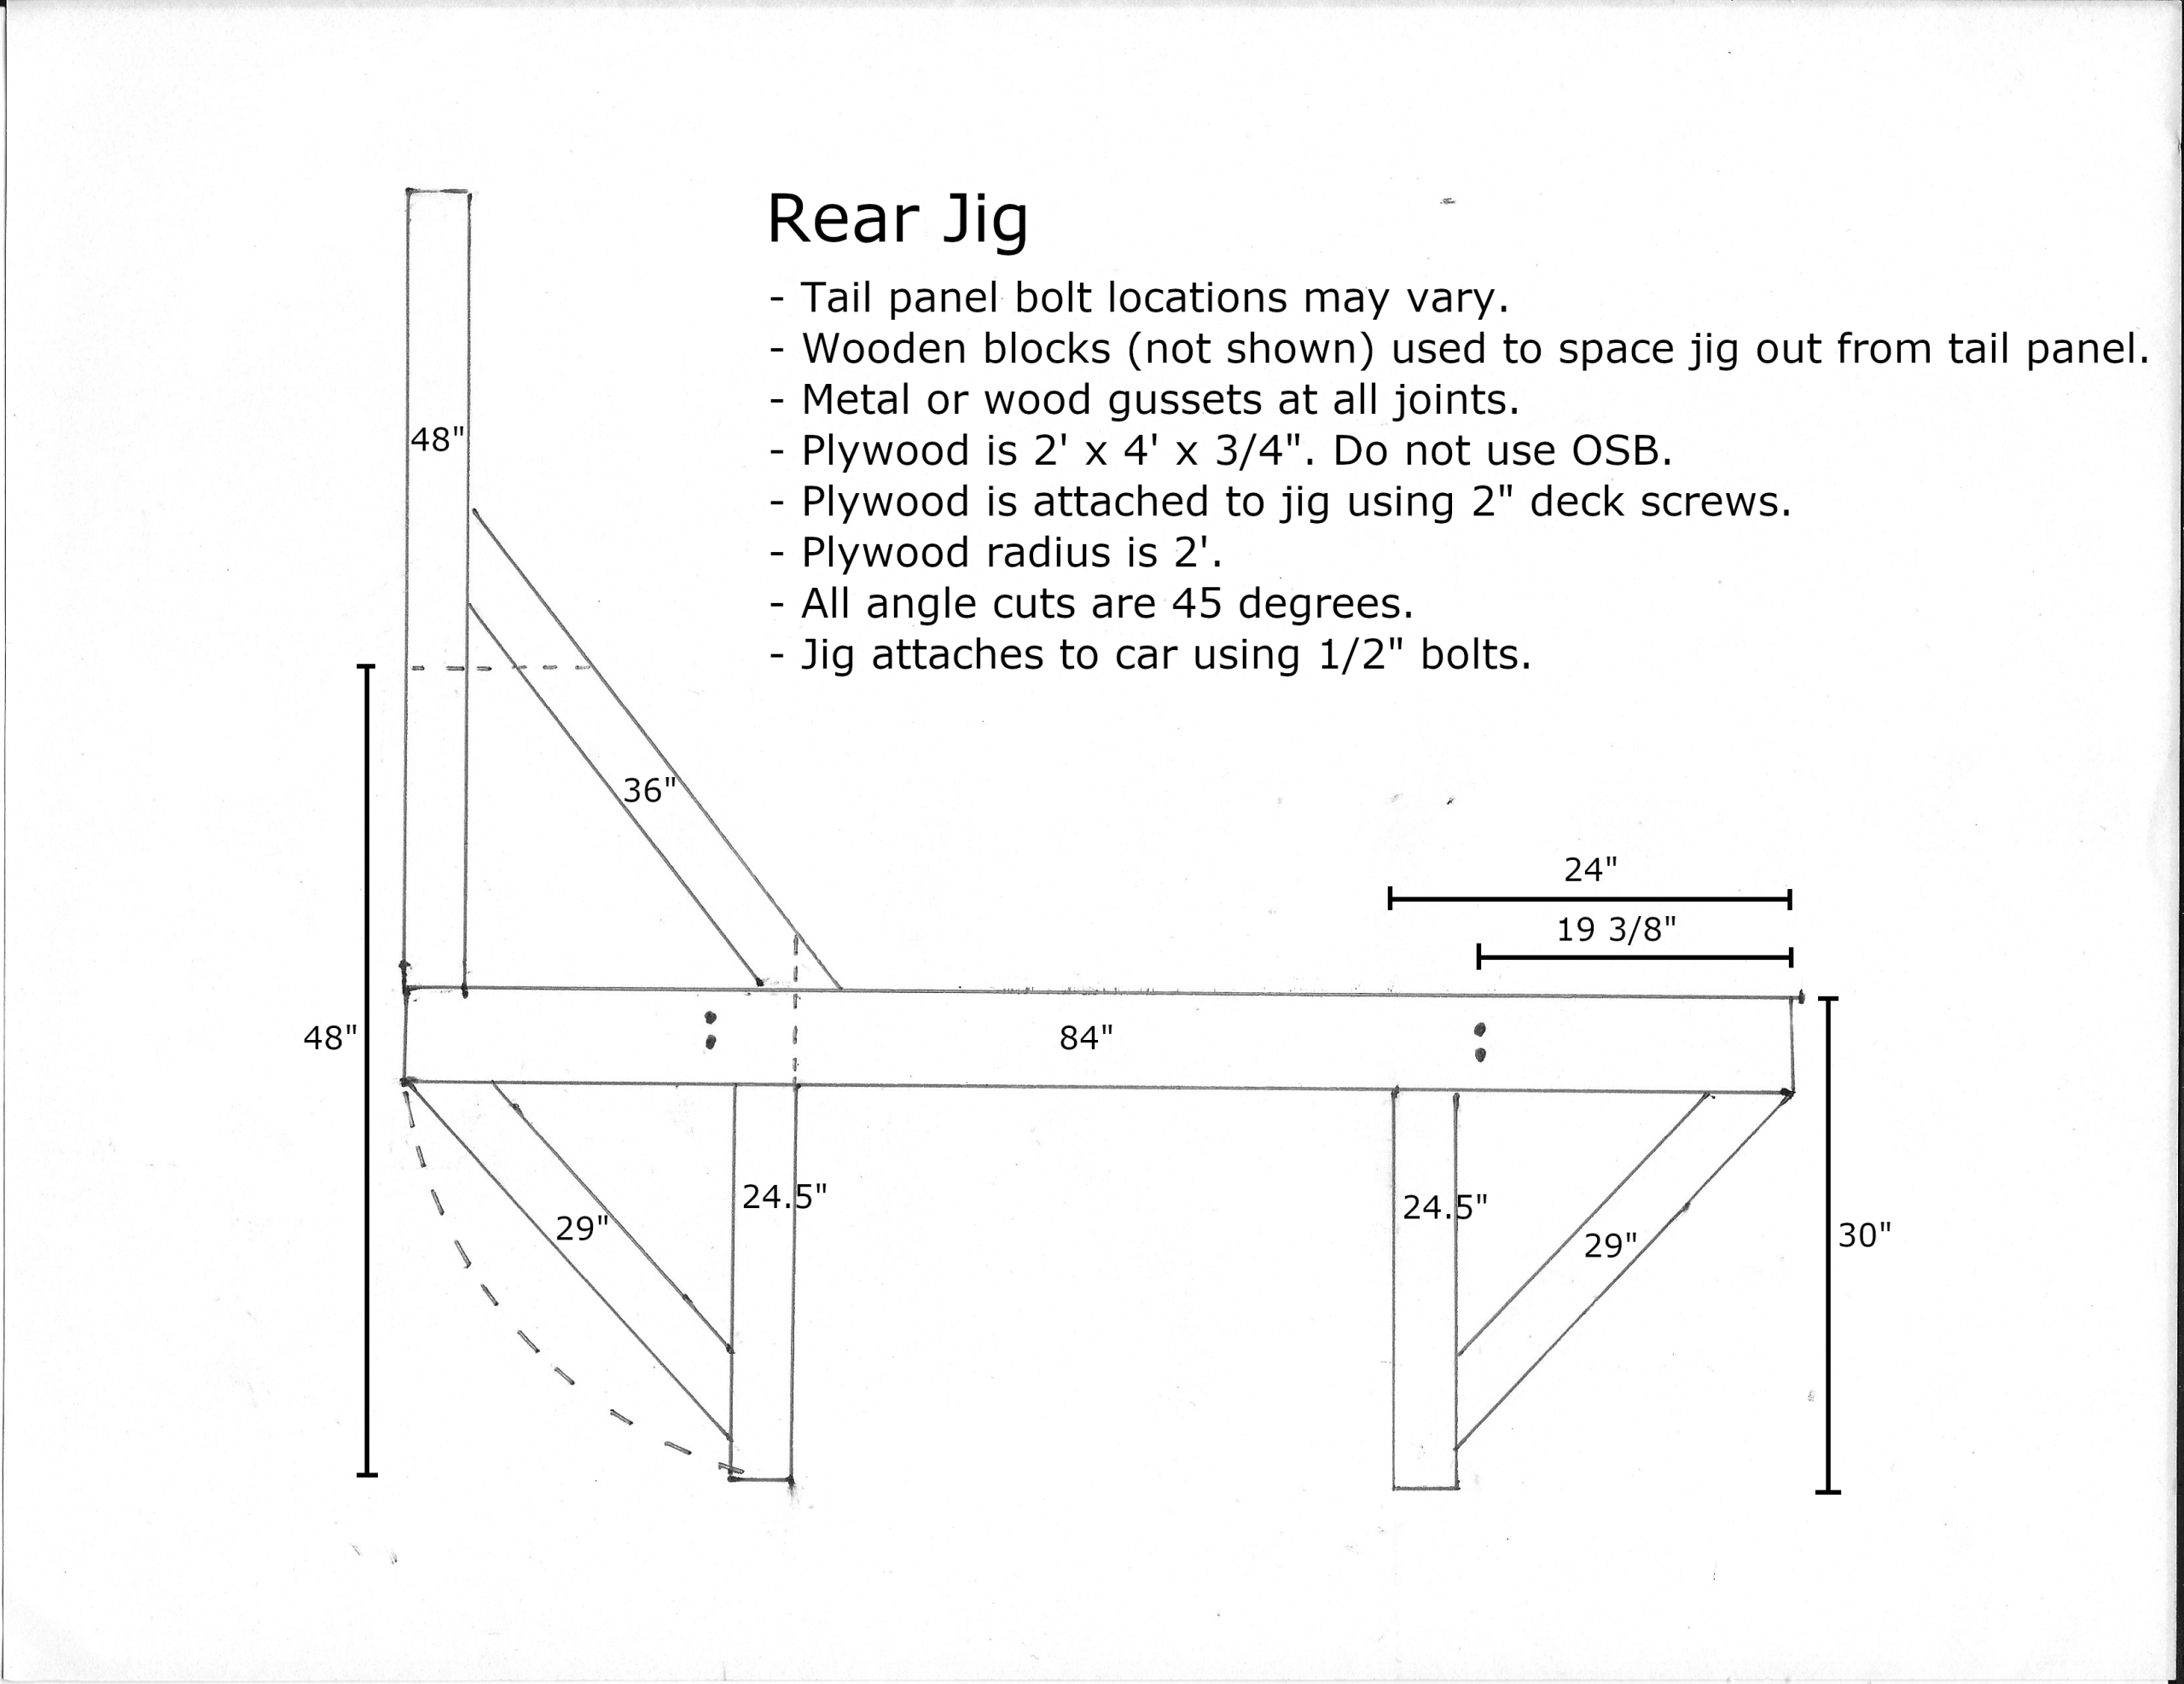
Rear Wooden Tip Over Jig Cut List
This section outlines the lumber cut list for the rear wooden tip over jig.
| Cut Description | Nominal Size | Length |
| Main Support | 2″ x 6″ | 84″ |
| Leg (left) | 2″ x 4″ | 24.5″ |
| Leg (right) | 2″ x 4″ | 24.5″ |
| Leg to Main Support Diagonal Brace (left) | 2″ x 4″ | 29″ (45 degree end cuts) |
| Leg to Main Support Diagonal Brace (right) | 2″ x 4″ | 29″ (45 degree end cuts) |
| Vertical Support (tip over leg) | 2″ x 4″ | 48″ |
| Vertical Support to Main Support Diagonal Brace | 2″ x 4″ | 36″ (45 degree end cuts) |
| Pivot Point (plywood) | 2′ x 4′ x 3/4″ | 2′ x 4′ x 3/4″ (2′ radius) |
| Tail panel stand off (left) | 2″ x 4″ | 6″ (edge cut to 45 degrees) |
| Tail panel stand off (left) | 2″ x 4″ | 6″ (edge cut to 45 degrees) |

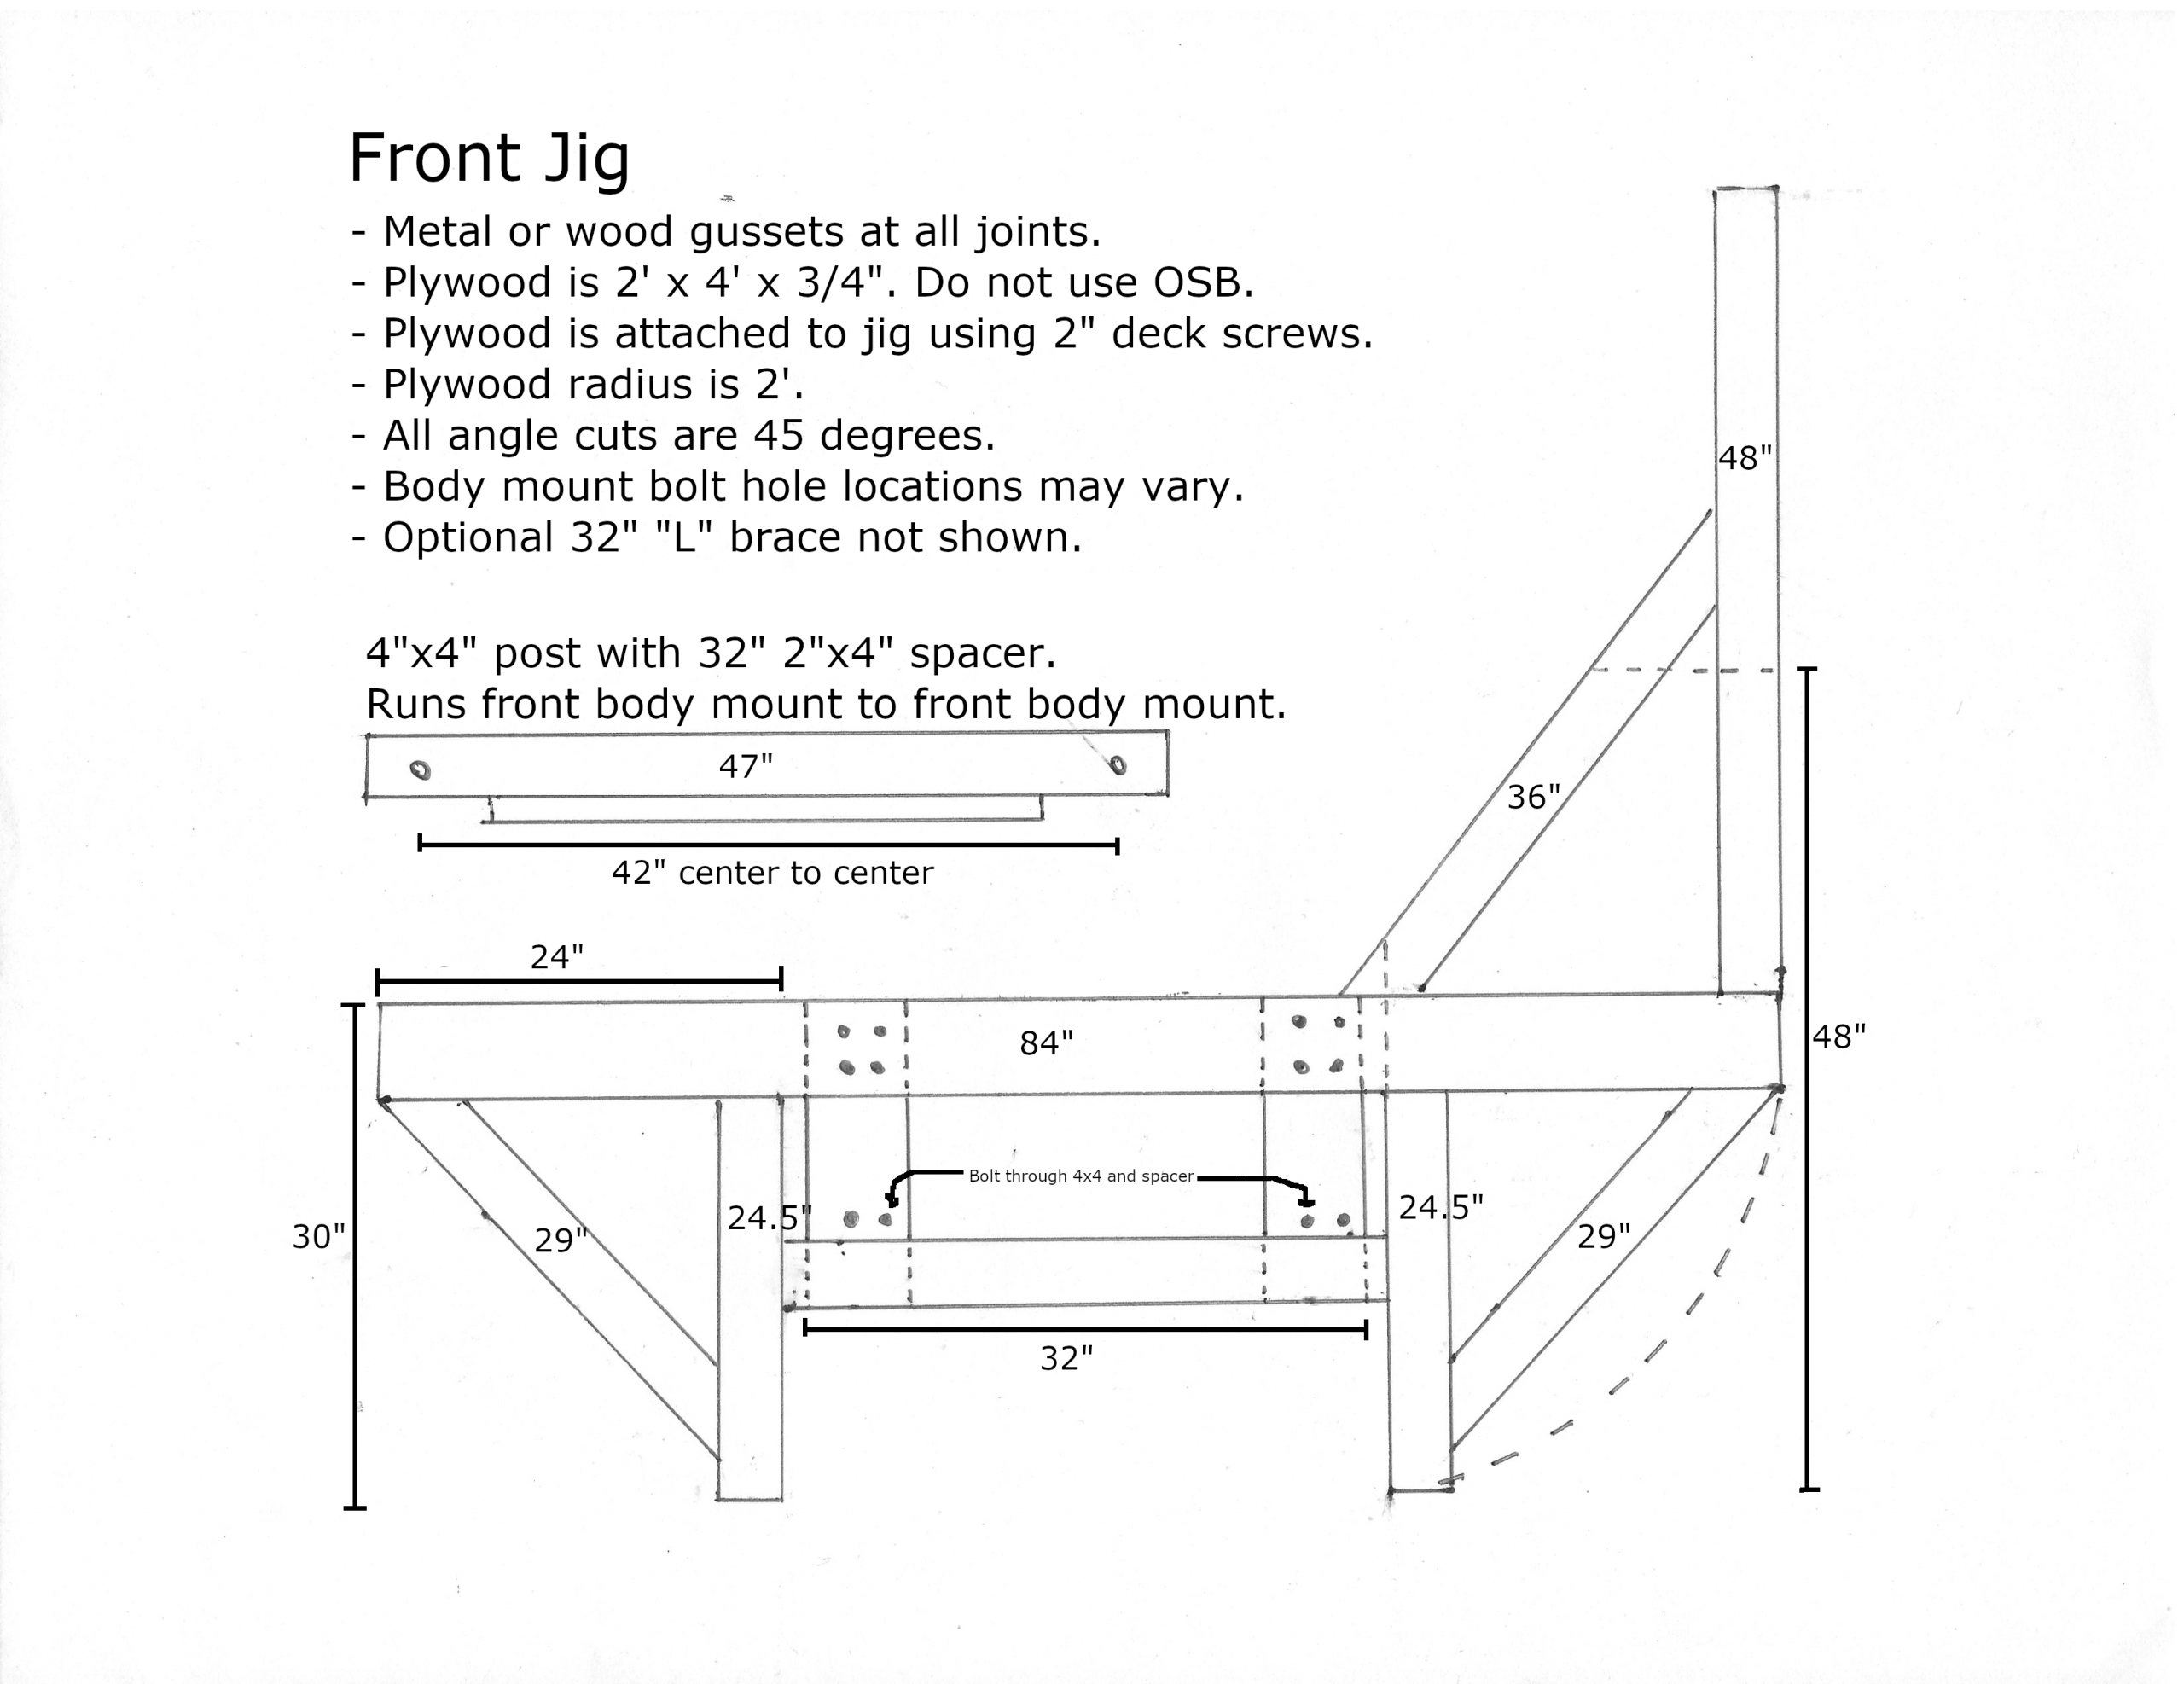
Front Wooden Tip Over Jig Cut List
This section outlines the lumber cut list for the front wooden tip over jig.
| Cut Description | Nominal Size | Length |
| Main Support | 2″ x 6″ | 84″ |
| Leg (left) | 2″ x 4″ | 24.5″ |
| Leg (right) | 2″ x 4″ | 24.5″ |
| Leg to Main Support Diagonal Brace (left) | 2″ x 4″ | 29″ (45 degree end cuts) |
| Leg to Main Support Diagonal Brace (right) | 2″ x 4″ | 29″ (45 degree end cuts) |
| Vertical Support (tip over leg) | 2″ x 4″ | 48″ |
| Vertical Support to Main Support Diagonal Brace | 2″ x 4″ | 36″ (45 degree end cuts) |
| Pivot Point (plywood) | 2′ x 4′ x 3/4″ | 2′ x 4′ x 3/4″ (2′ radius) |
| Horizontal Left to Right Leg Brace | 2″ x 4″ | 36″ |
| Vertical Support Mount (left) | 2″ x 6″ | 18″ |
| Vertical Support Mount (right) | 2″ x 6″ | 18″ |
| Body Mount Support Beam | 4″ x 4″ | 47″ |
| Body Mount Support Beam Spacer | 2″ x 4″ | 32″ |
| “L” Brace Bottom (Extra support) | 2″ x 4″ | 32″ |
| “L” Brace Top (Extra support) | 2″ x 4″ | 32″ |
Tools
This section outlines the tools that are required to build the wooden tip over jig.
- Circular Saw
- Jig Saw
- Hammer
- Impact driver for screws
- Speed Square
- Tape Measure
- Pencil
- String and nail
- Drill
- 1/2 spade drill bit
- 3/4 spade drill bit
- 3/4″ wrench
- Clamps
Disclaimer
Building any kind of DIY rotisserie or wooden tip over jig is a serious matter. Failure to understand the limitations of wood and steel can result in physical injury and/or damage to your project car.
Before You Begin
Remove all of the extra weight from the vehicle, taking the vehicle down to a bare shell. This means remove the doors, rear end, rear suspension, subframe, etc. Do not leave any unnecessary weight attached to the vehicle.
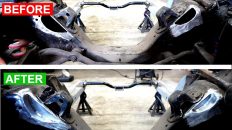
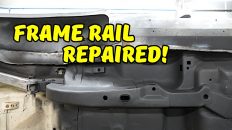
Inspect all of the wooden tip over-jig attachment points for rust. You’ll need to repair these areas before attaching the wooden tip over jig to your project vehicle.
Take your own measurements of the areas where the wooden tip over jigs will attach to the car. It’s possible that the measurements for my car may not match your car. These older cars are likely to have slight differences in measurements.
Building The Wooden Tip Over Jigs
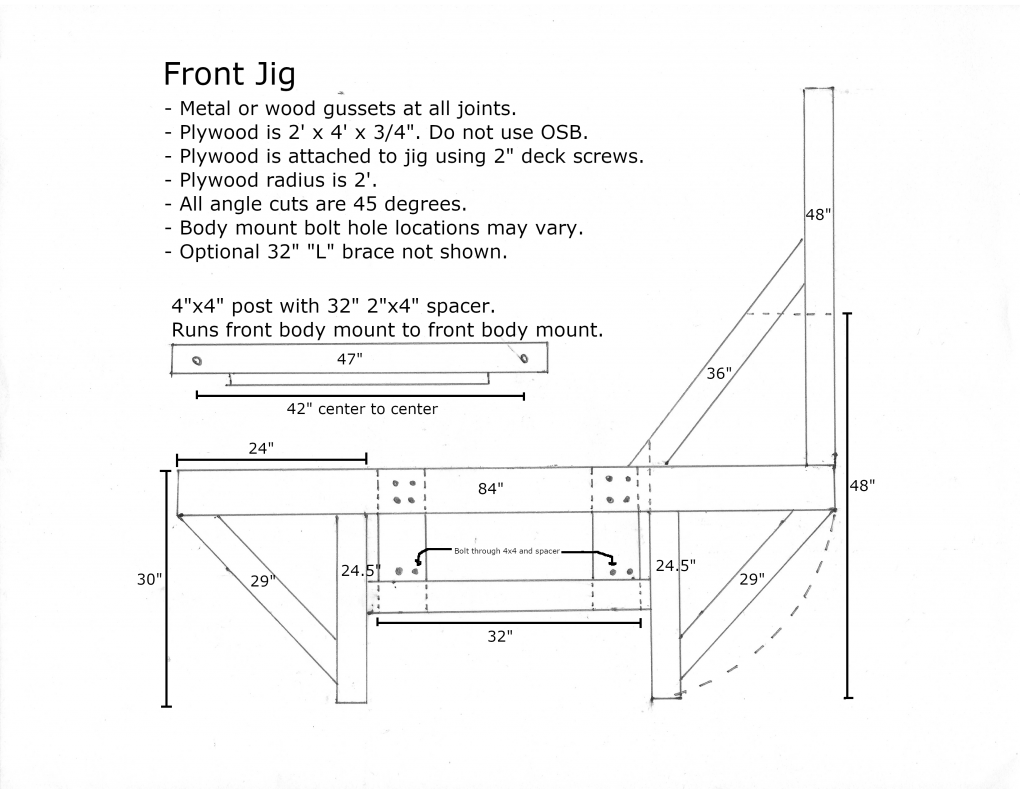
The front and rear wooden tip over jigs are mostly the same regarding measurements and cuts. This was by design to keep things simple and to speed up the build process. You can make most of the cuts for both jigs at the same time. The front jig differs in the center where it attaches to the 4×4 post. I’ve added vertical 2×6 supports to make mounting to the 4×4 post easier. This also allows you to set the height of the front wooden tip over jig so that the front and rear of the car are at the same height when the vehicle is not tipped over.
Building the wooden tip over jigs is a pretty straight forward process.
- Cut all of your lumber to the dimensions listed above.
- Attach the lumber using 2″ deck screws, 3″ deck screws, and wooden gussets or metal plates. All joints must be gusseted from both sides! I used metal mending plates on the rear of the jigs to save space.
- Once the jigs are built, attach them to the car using the 1/2″ bolts. Pre drill your holes using a spade bit that is slightly larger than your bolts. Ensure the bolts are very tight, but not so tight that the wood begins to split. The friction is going to hold everything together.
- Remove the jack stands from under the car and allow the car to sit on the wooden tip over jig. This is the first test. Ensure everything is securely fastened and that no splitting has occurred.
- Clear a path on the side of the car that will be accepting the tipped over car. Leave plenty of space so that you don’t have to worry about it as you are tipping the car over.
- Tip over the car with the help of another person. Take it slow and listen for odd noises. Don’t get behind the car.
- Get out your favorite paint stripping tool and get to work!
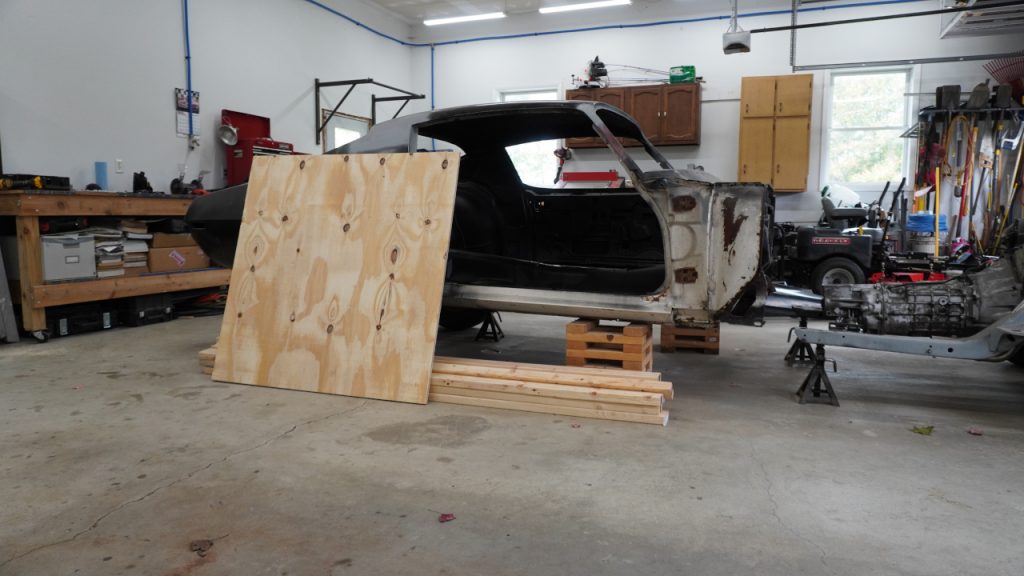
Lumber read to go 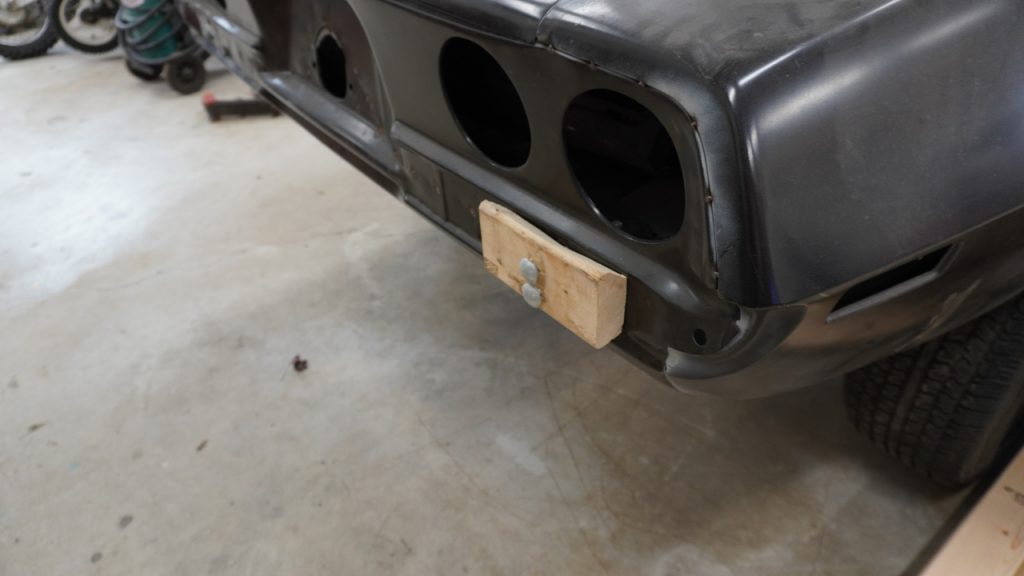
Rear stand off 
Lumber cut and fitted 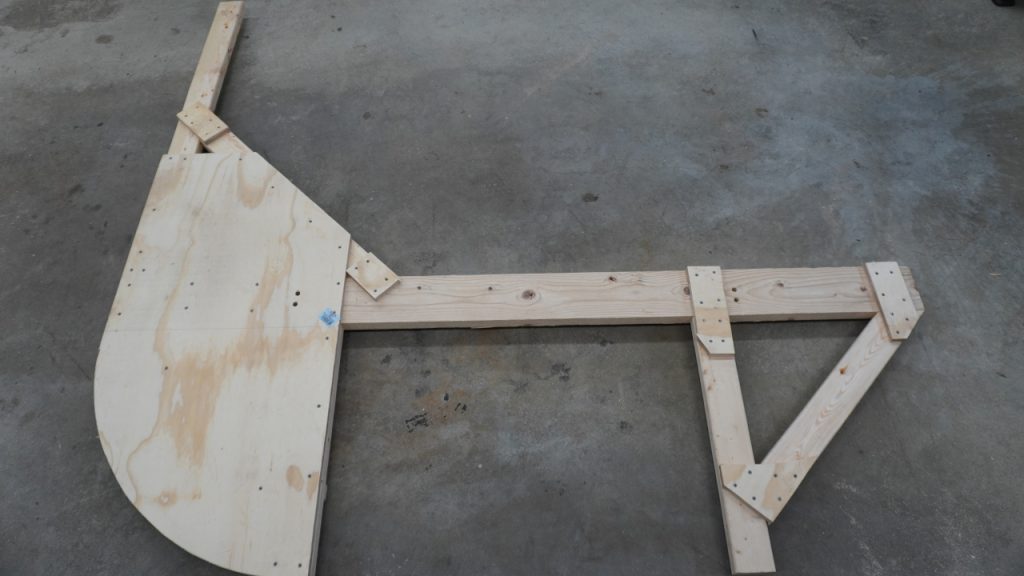
Front view of assembled tip over jig 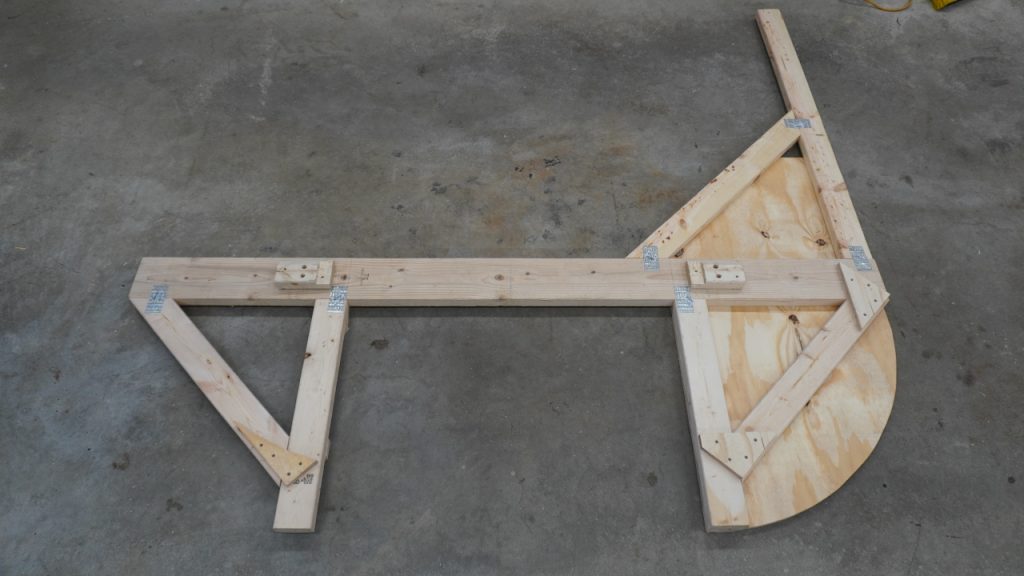
Rear view of assembled tip over jig 
Verticals to attach front tip over jig to Camaro 
Camaro supported by tip over jig only 
Front tip over jig attached to Camaro 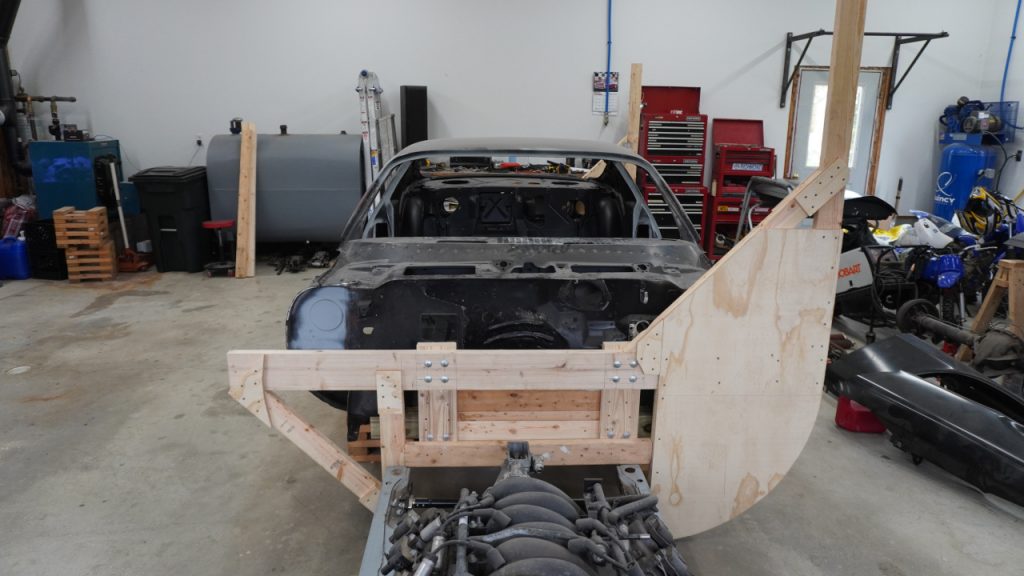
Front tip over jig attached to Camaro 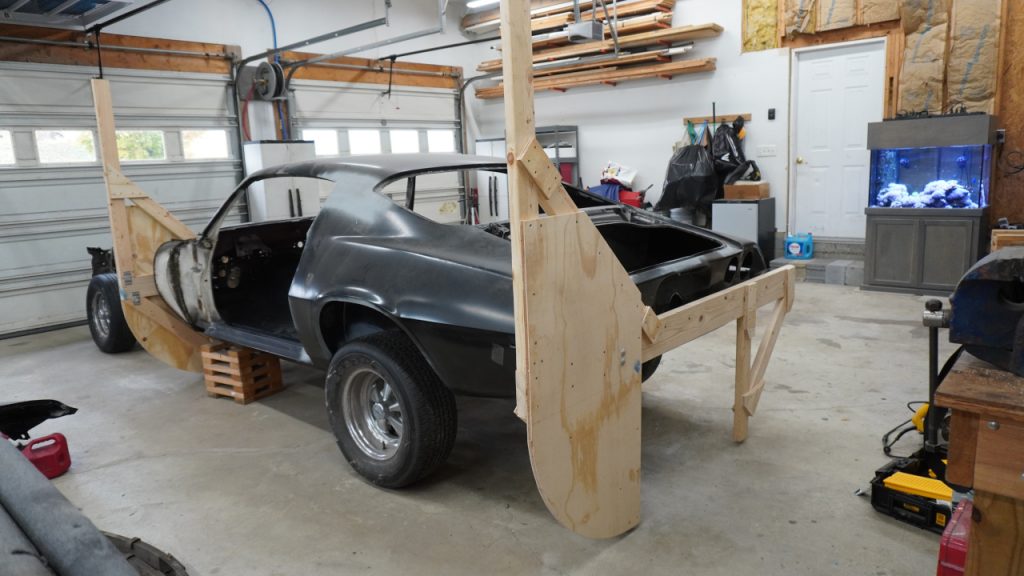
Rear tip over jig attached to Camaro 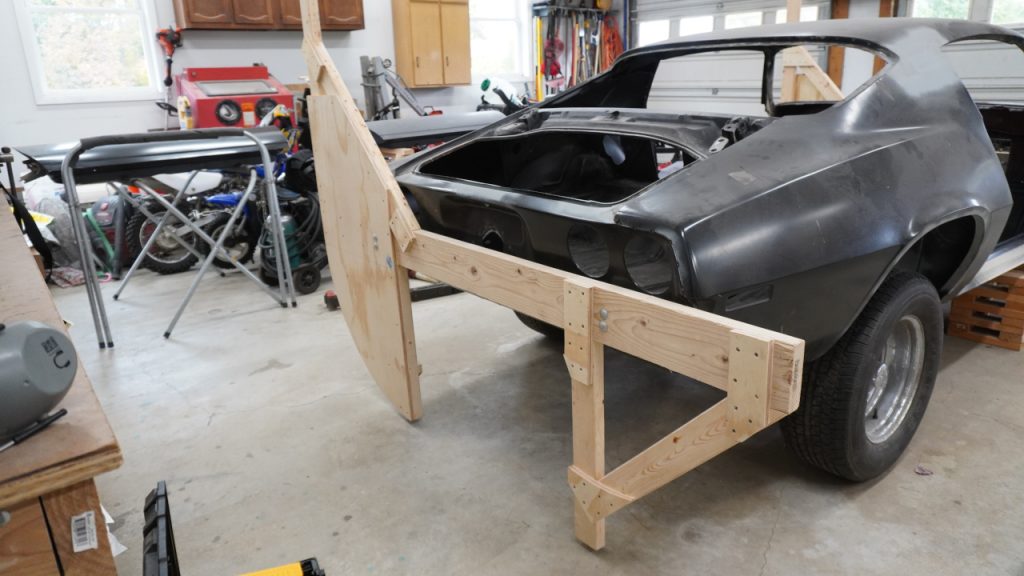
Rear tip over jig attached to Camaro 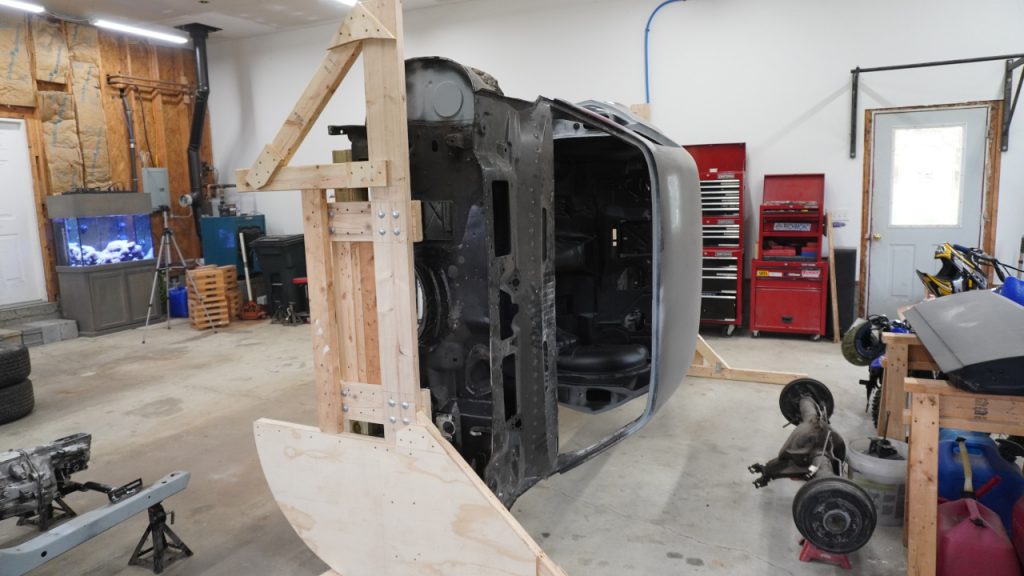
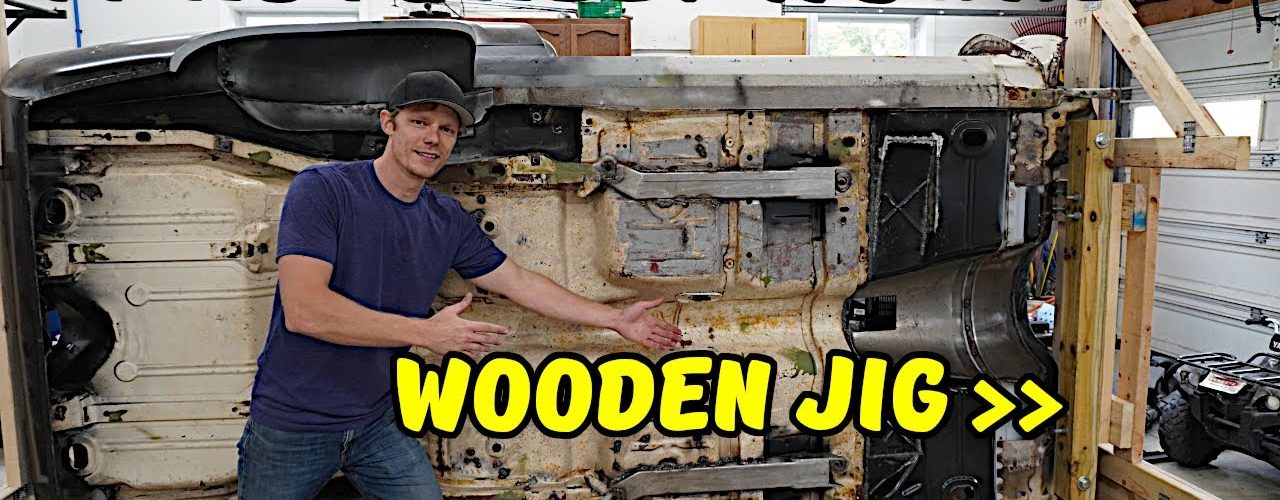
Camaro tipped over view 1 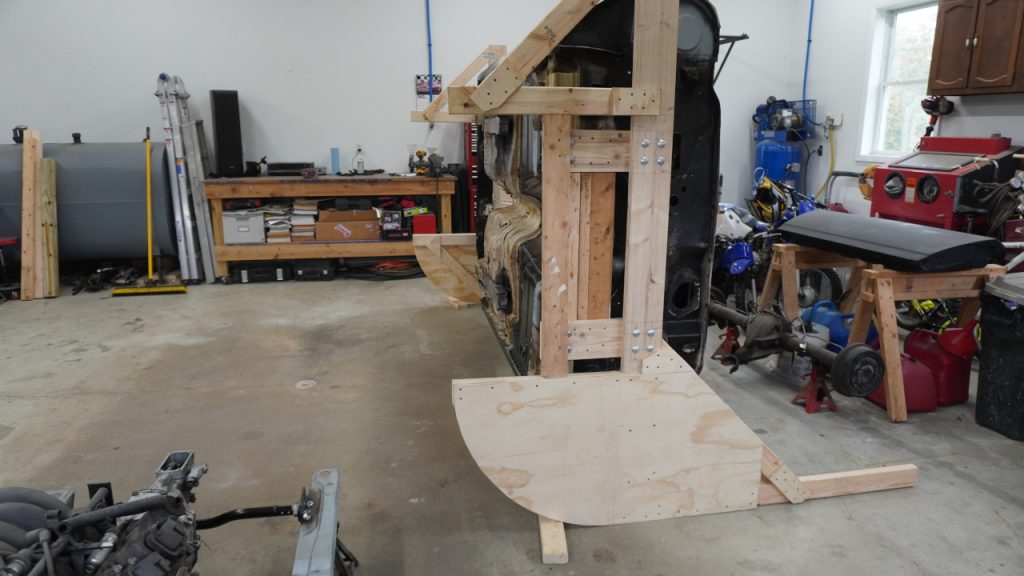
Camaro tipped over view 2 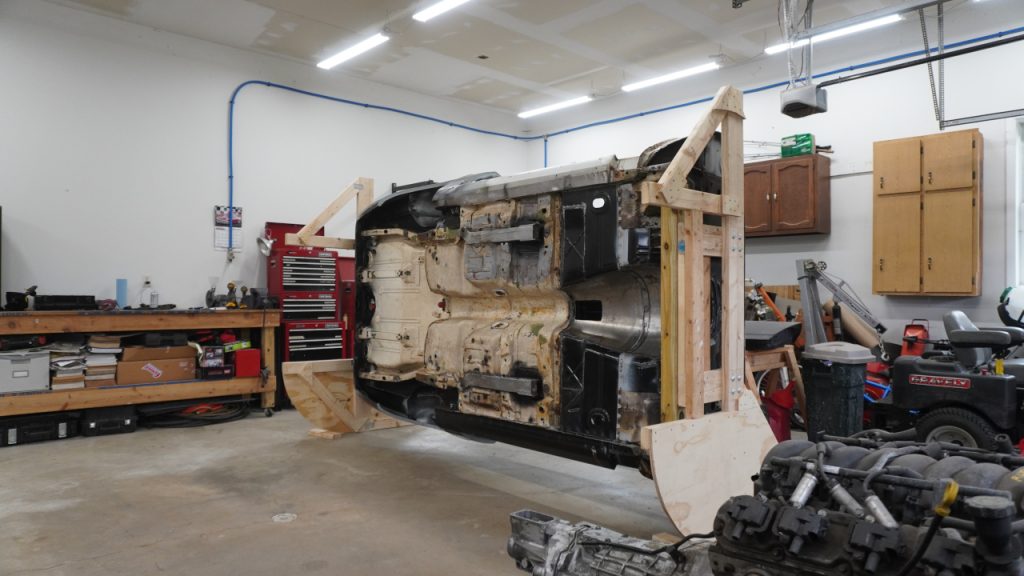
Camaro tipped over view 3 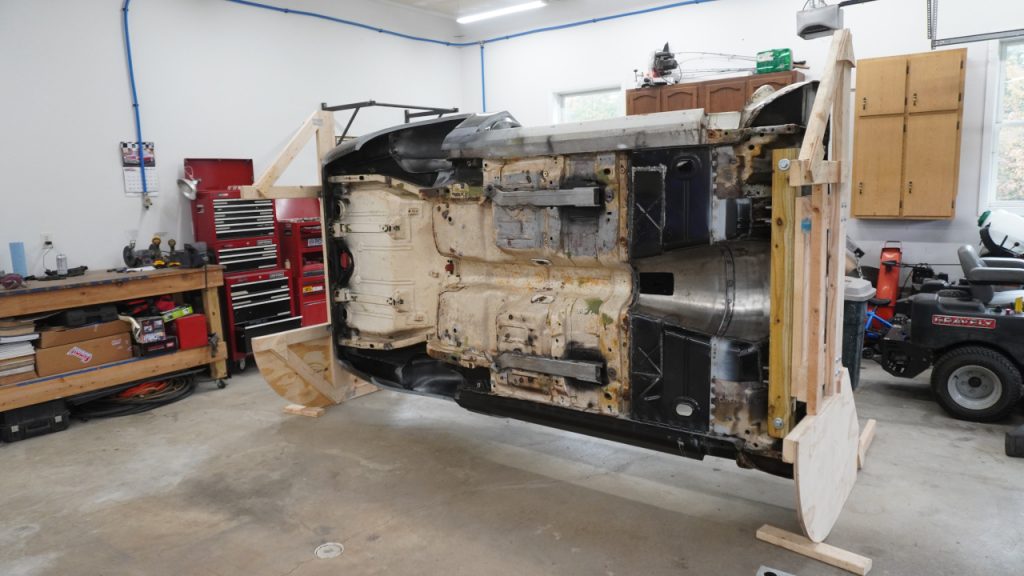
Camaro tipped over view 4 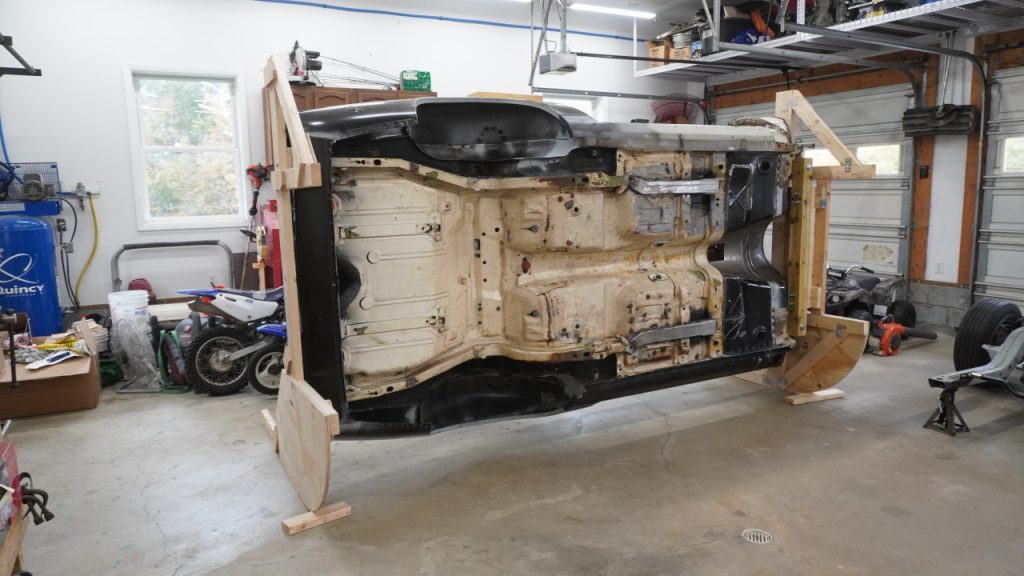
Camaro tipped over view 5 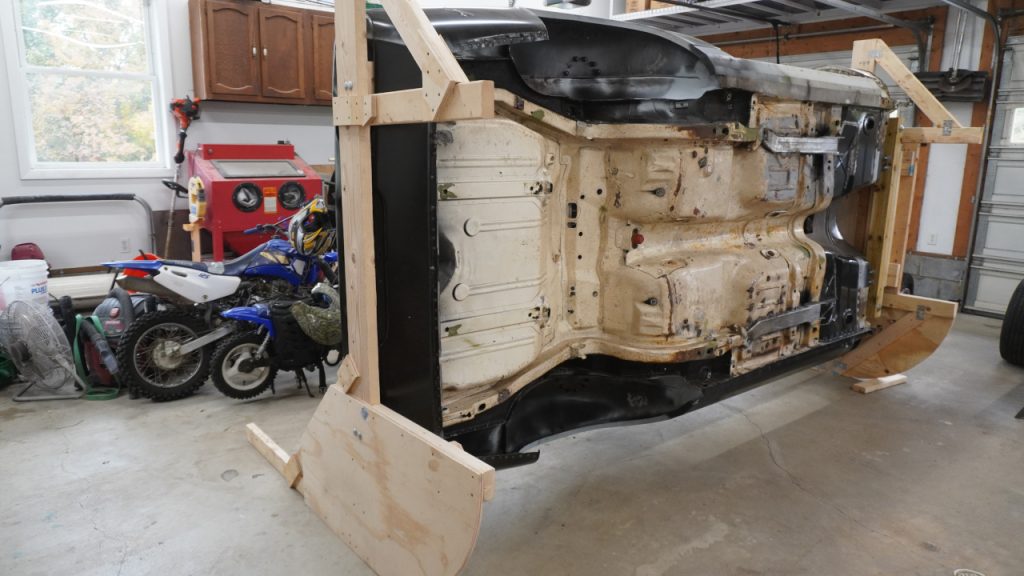
Camaro tipped over view 6 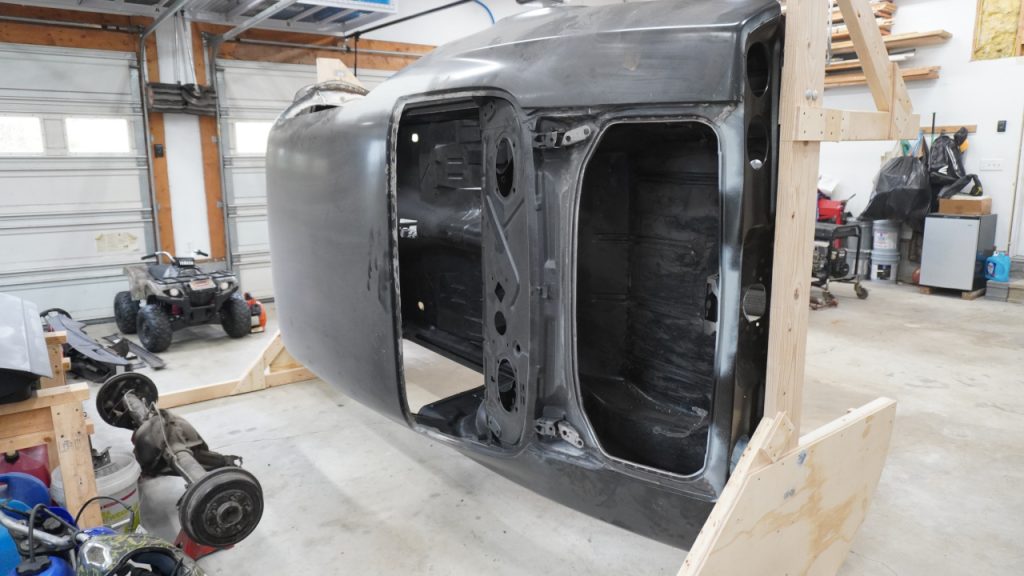
Camaro tipped over view 7 Front wooden tip over jig dimensions Rear wooden tip over jig dimensions