Does your vehicle have a leaking flex pipe? Is your flex pipe attached to a section of exhaust pipe that is expensive to replace? Maybe you just need to replace a small section of exhaust? If you answered yes to any of these questions, then this post is for you. I am going to show you how to cut out your flex pipe and replace it with a new universal flex pipe. The process is the same for cutting out any section of exhaust.
Tools Required
- Digital Caliper
- TotalFlow Exhaust Flex Pipe (Part used for the 2007 Toyota Camry 2.4L)
- Sawzall, hacksaw, or grinder with cutoff wheels
- Penetrating Oil (Only if you need to remove a section of exhaust)
- Gaskets (Only if you need to remove a section of exhaust)
- Welder, Saddle Clamps, Butt Joint Clamps, or Lap Joint Clamps
- Safety Glasses – Buy in bulk to save money
Order the Replacement Flex Pipe
You need to determine the inlet and outlet side of the replacement flex pipe and you also need to determine the overall length. Do not rely on the online store’s application. The ones on Amazon that “fit” the Toyota Camry would not have worked and this was apparent based on actual measurements and the reviews of the product.
Begin by jacking your car up off the ground so that you can get under it. Once under the car, determine the length of the section you are going to cut out. This is important because this length will determine where your cuts will be. Be sure to account for about two inches of overlap on each end if you are using the saddle style exhaust clamps. You may be able to leave less overlap if you are using another style of clamp or welding in the new piece. I left about a quarter inch of overlap so that I didn’t have to fill gaps during the welding process.
Next, take the digital caliper and measure the inlet and outlet where you plan on making your cuts. This measurement will give you the outside diameter of the existing exhaust pipe, which will be the inside diameter of the replacement exhaust pipe. Pay close attention to this and make sure you order the correct part. The replacement flex pipe measurements should be labeled with I.D. for inside diameter or O.D. for outside diameter.
With your measurements in hand, you are ready to order your replacement flex pipe. Be sure to order a flex pipe with exhaust pipe already welded to it like the one shown in the gallery below. This will allow you to clamp it down over the existing exhaust pipe. If you do not get a flex pipe with exhaust pipe already welded to it, then plan on welding it in.
Preparation
Determine if you have to remove a section of exhaust pipe in order to slip on the replacement flex pipe. This will likely be the case if you are using clamps to install the replacement flex pipe, though butt joint clamps may not require this.
Inspect the exhaust hardware to see if it is salvageable. If it is not, purchase replacement nuts and bolts from your local hardware store and be prepared to cut the old ones off. I like to double nut these bolts to prevent them from coming loose. If the exhaust hardware is salvageable, spray the nuts and bolts 24 hours in advance using a high quality penetrating oil such as Aerokroil. Spray them again a few hours before you plan on tackling this.
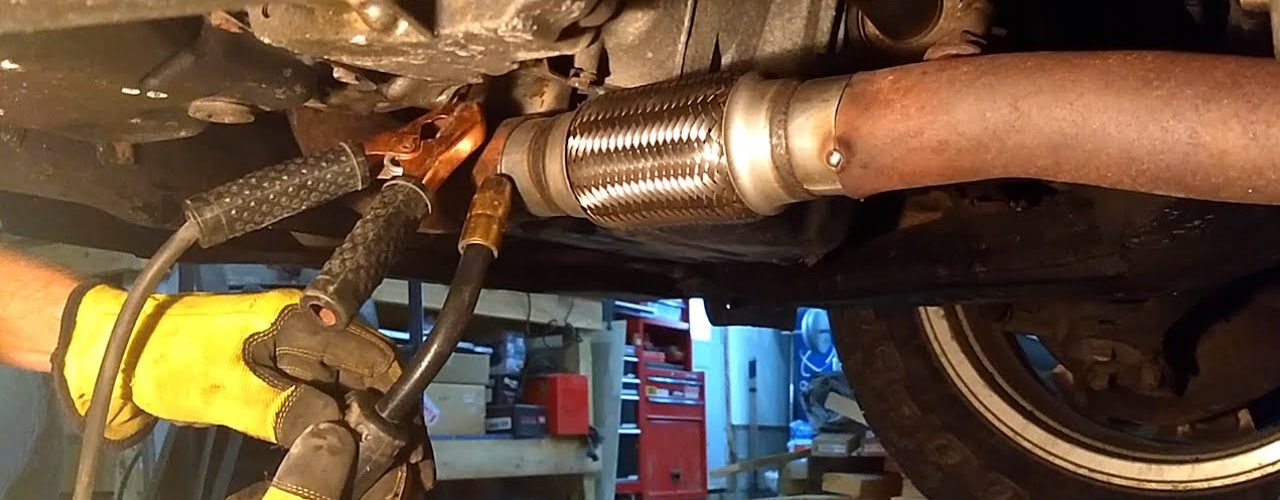
Remove the Leaking Flex Pipe
Removing the leaking flex pipe is fairly straightforward. The process goes a lot faster if you have a sawzall, but can certainly be done with a hacksaw. Just make sure you have a sharp blade on your hacksaw. You may need to use a cutoff wheel on a grinder if the sawzall is too large. Sometimes you can get a bit more room with a sawzall by flipping the blade around so the teeth are facing up.
Begin by holding the replacement flex pipe up to the old section. Using a permanent marker, mark the locations of your cuts and don’t forget to account for the overlap if needed. Set the replacement flex pipe off to the side and grab your cutting tool of choice and make your cuts.
Install the Replacement Flex Pipe
The installation process will vary based on how you are securing the replacement flex pipe. If you need a lot of overlap, you may need to remove a section of the exhaust in order to slip on the replacement flex pipe. You may not need to remove the exhaust if you are welding in the replacement flex pipe. Also, disconnect your battery if you are doing any welding.
Once the exhaust is welded in or securely clamped, start the car and check for leaks.

Flex pipe tools and materials 
Leaking flex pipe removed 
Old and new flex pipe side by side 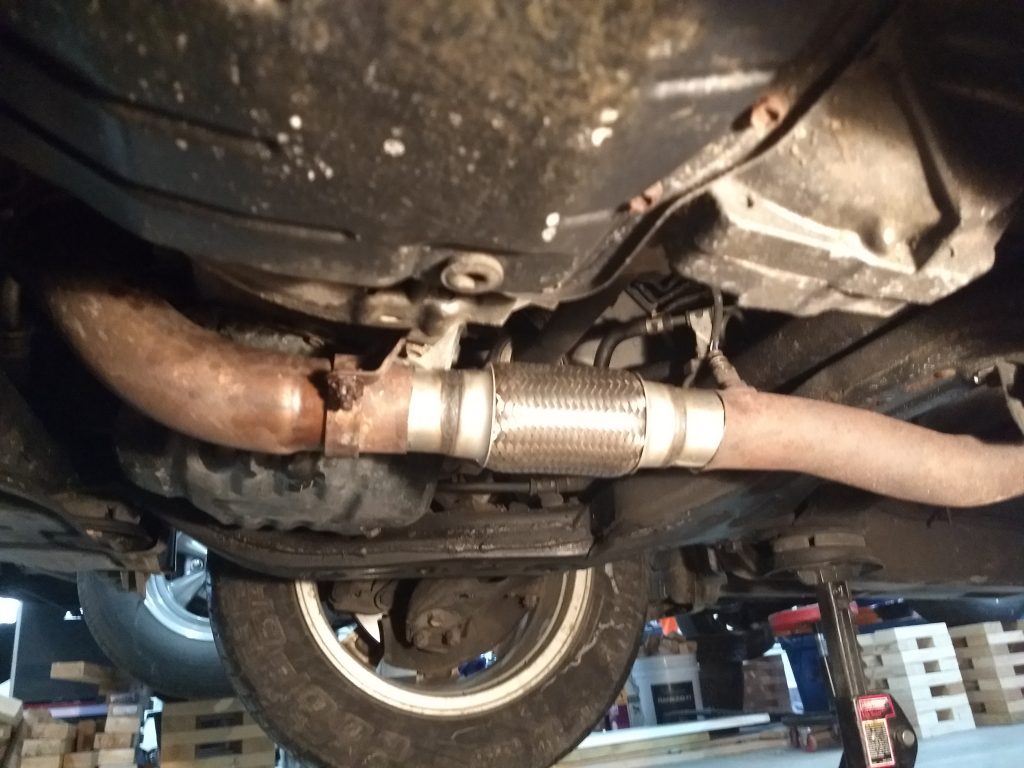
New flex pipe fitted 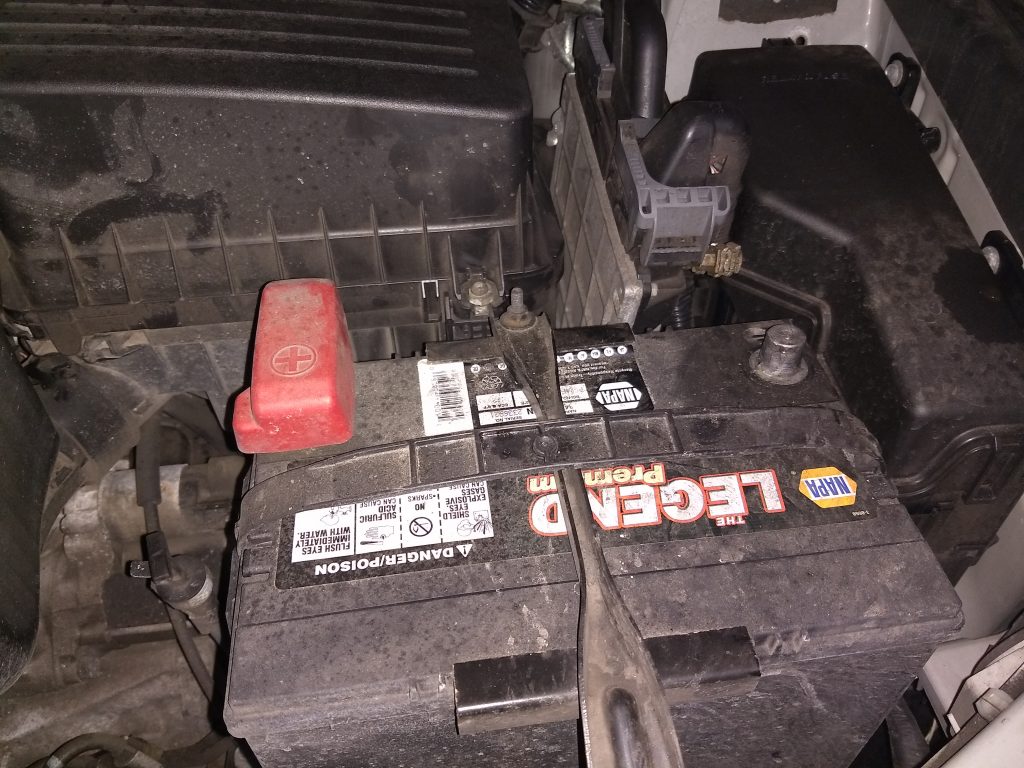
Battery disconnected prior to welding 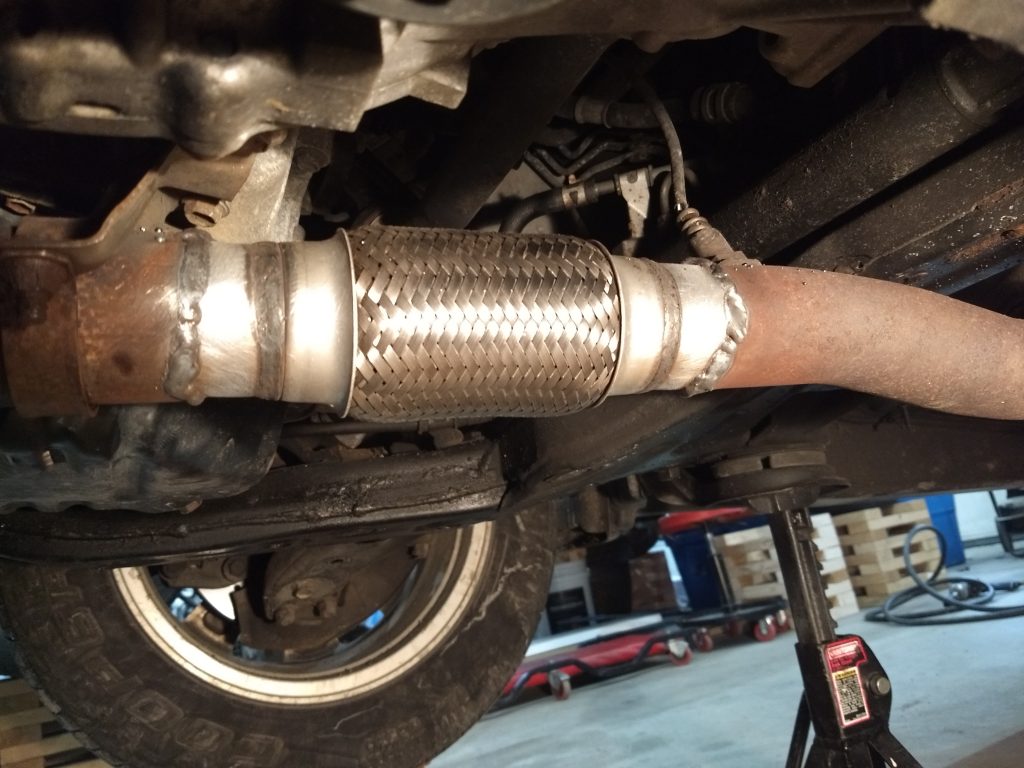
Flex pipe installation complete


Add comment