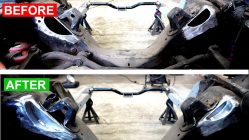
In the previous post, we removed the passenger side torque box from our 1971 Camaro project car and we discovered a small rust hole in the floor pan. We also damaged the floor pan in the seat belt mounting area with the air chisel while trying to remove remove the torque box. It’s going to be easier to cut the section out and replace it instead of trying to repair each area individually. So in this post, we are going to show you how to make and install a patch panel for your floor pan.
Creating The Template
Begin by removing the paint around the area that you need to cut out. Remove paint until you reach good metal. I prefer to use Black Hawk Strip Discs (read our review here) or course conditioning discs over sanding discs. I find that if you remove the paint after you cut out the area to be patched, you risk thinning the metal edges where you are going to weld. Thinning the edges creates a scenario where weld burn through is more likely the happen.
Next, use poster board paper, cereal boxes, or similar cardboard to create the template for the area to patch. Stay away from corrugated cardboard because it’s difficult to get nice clean cuts and is difficult to work with due to its thickness. Also, consider how much effort you want to put into the patch panel. Try to keep the template as simple as you can.
Now that you have your paper template, it’s time to transfer it over to sheet metal. Begin by selecting sheet metal that is the same thickness as the area to be patched. You can use a sheet metal gauge tool to determine the thickness of your metal. Check our review of the Eapel Double Sided sheet metal gauge tool for more information.
Transferring The Template to Sheet Metal
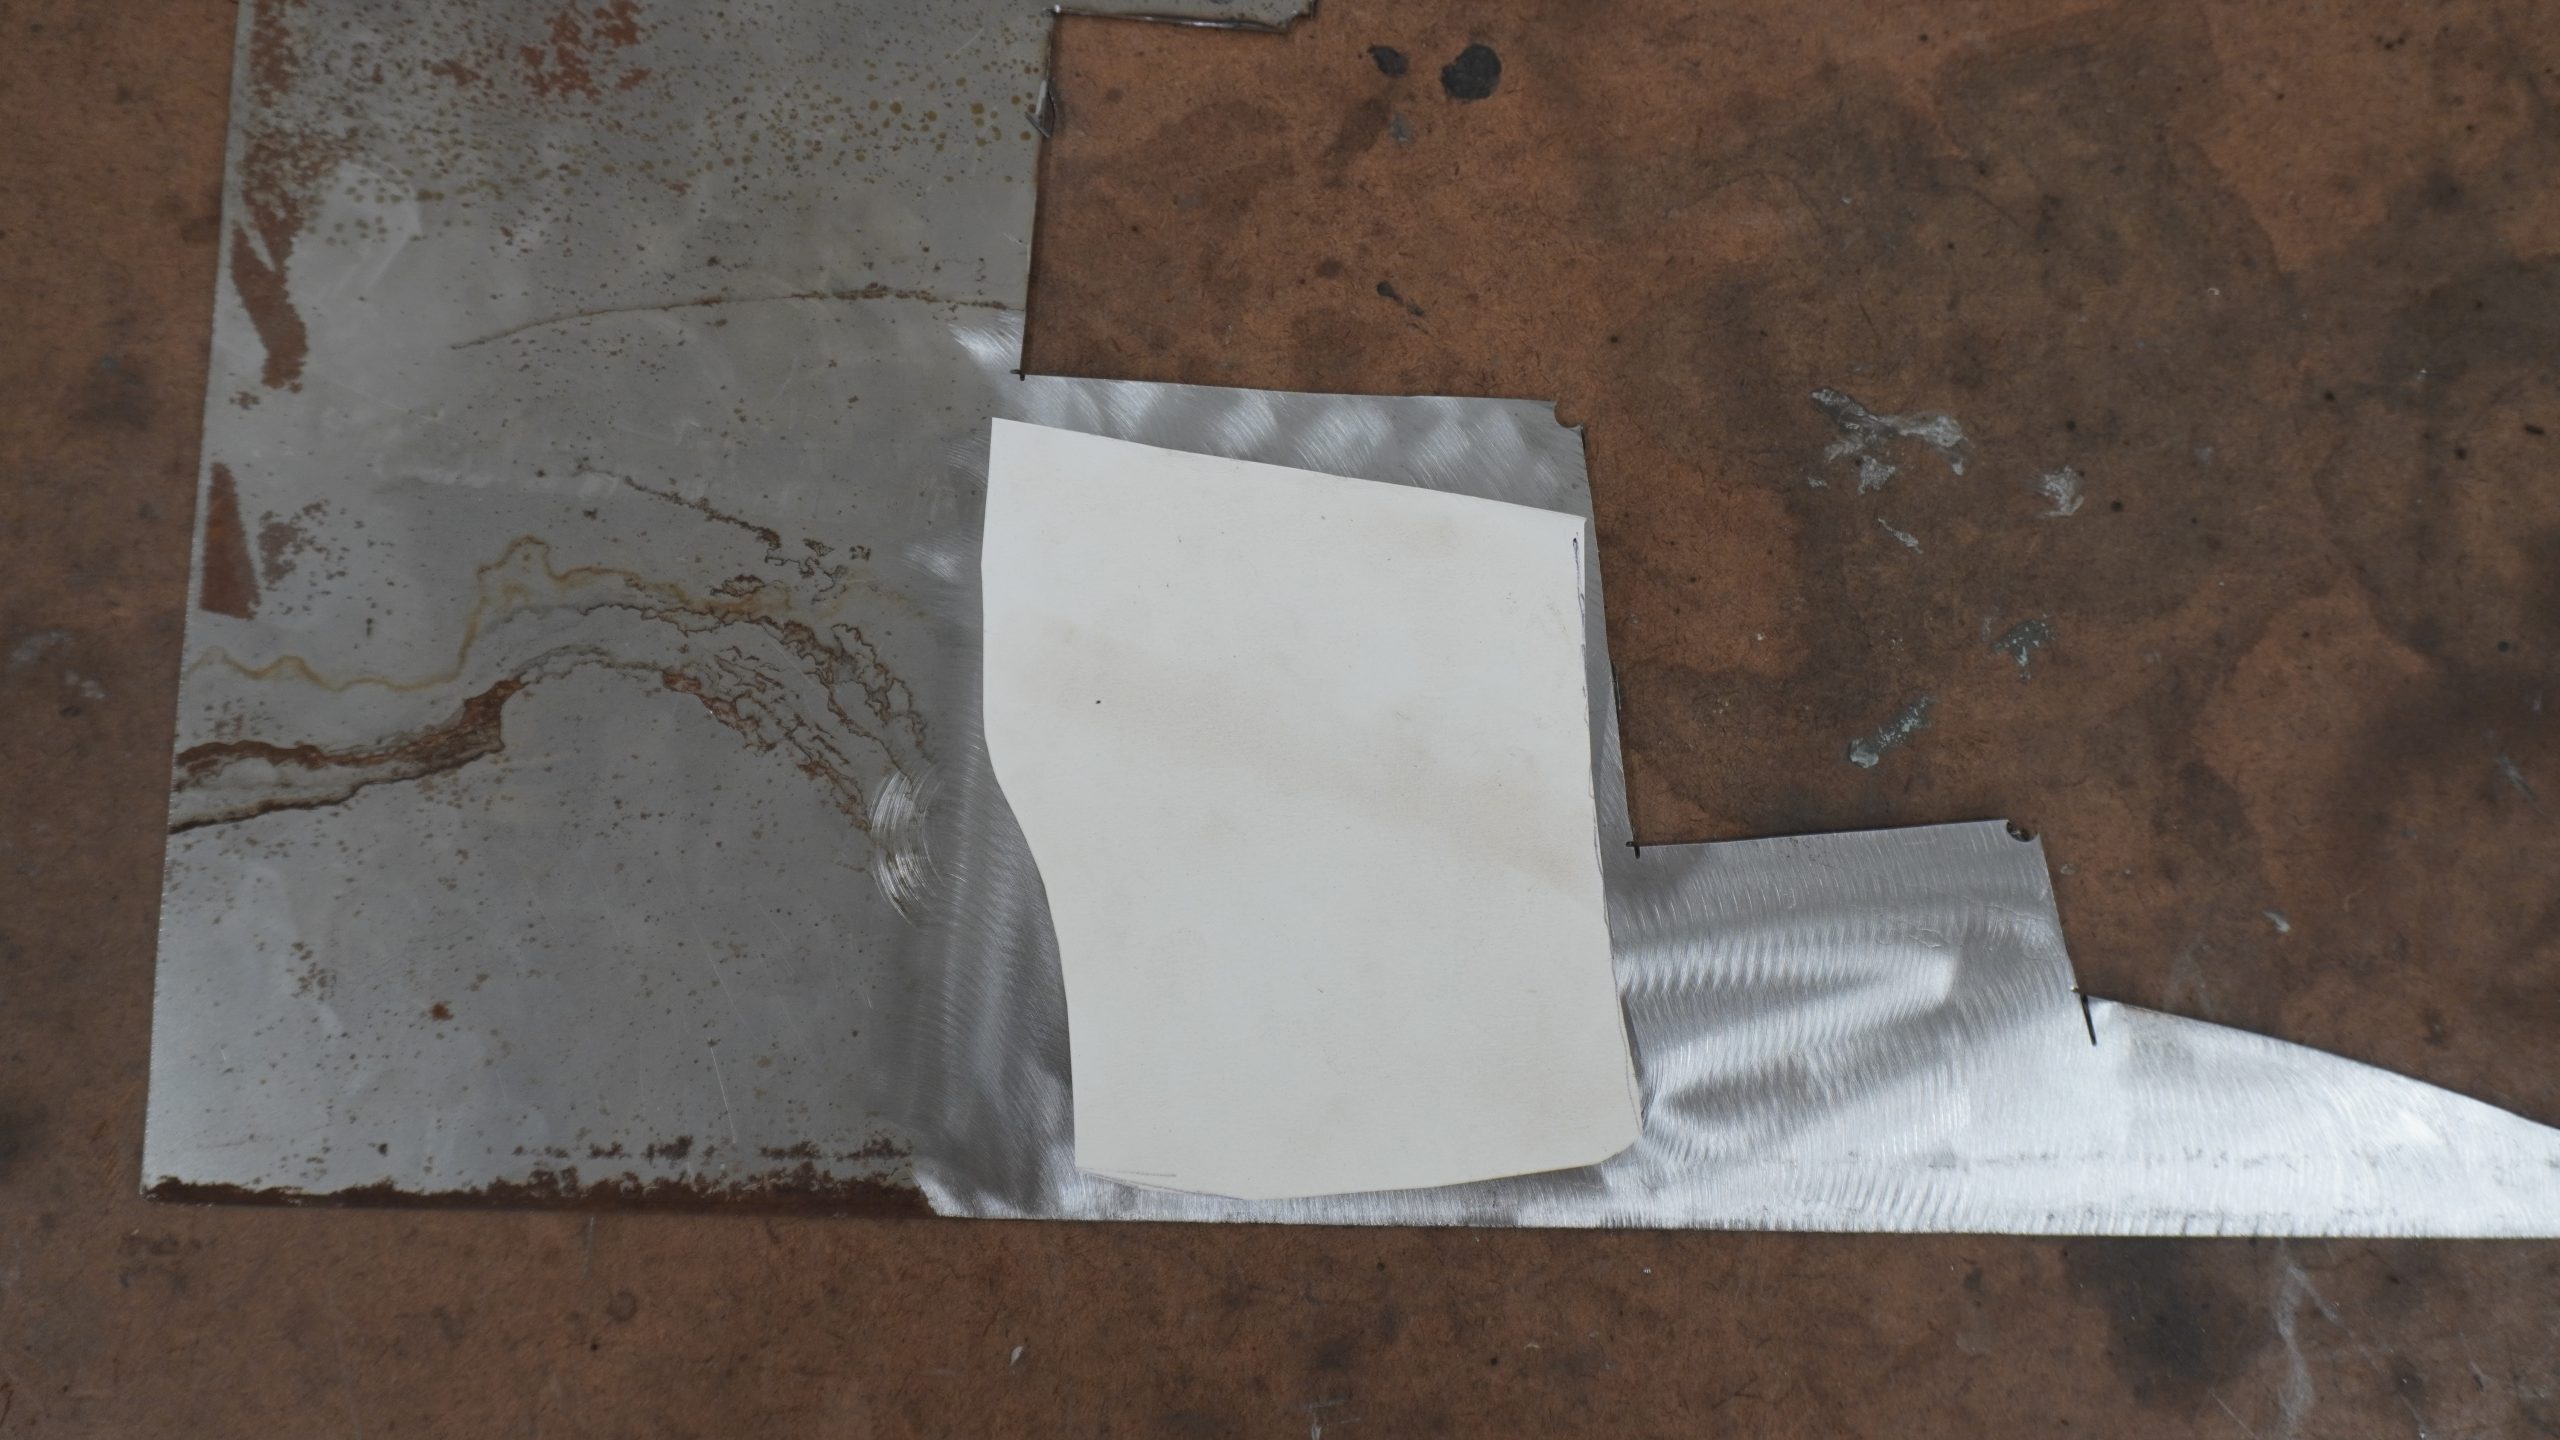
Next clean the rust off of the replacement sheet metal prior to cutting out the patch panel. Then position the paper template on the sheet metal in a way that maximizes the use of the sheet metal (it isn’t cheap). Trace around the paper template using a black permanent marker. You don’t need to be precise here because we haven’t cut the rusted/damaged area out of the car yet. Finally cut out the patch panel using your favorite cutting tool. I previously used a cut off wheel for all of my cuts until recently when I tried out the Genesis Electric Metal Shears. These things make cutting sheet metal a breeze and you don’t have the sparks flying everywhere. Don’t forget to pick up a good pair of tin snips for precise trimming.
So you have your patch panel cut out, now it’s time to form the patch panel to the area to be patched. This is where leaving the rusted/damaged area in the car is going to make your life easier. You can use the area in the car to ensure you get a properly formed patch panel.
Forming the Patch Panel
Okay, let’s begin forming the patch panel. If you need to make any bends, make those first. You may need to get creative. For this patch, we needed a bend that was very gradual compared to a sharp bend that you would get from using a metal brake. No problem. We put the metal into a vise along with a concrete stake and we used a body hammer to make our bend. Once the bends are made, begin making the other curves. You can use dollies in the vise or even use the car as a form. You may need to add some reference marks to the patch panel and the area to be patched so that you ensure the patch panel is being placed in the same location as you are going back and forth from the car to the vise.
Once you have the patch panel formed to match the area to be patched, position it over the area to be cut out. Take a metal scribing tool and trace around the patch panel, ensuring the patch panel doesn’t move.
Installing the Patch Panel
It’s now time to cut out the area to be patched. For the initial cut, I find that a cut off wheel or an air saw work best. Stay on the inside of the scribe marks for a nice tight fit. With the area cut out, it’s now time to begin fitting the patch panel. Attach welding magnets to the patch panel to make it easier to hold and maneuver it. At this point the patch panel should be a close fit. I use the metal scribing tool to mark areas that need trimmed. You can trim the patch panel or the area on the car to be patched. I generally prefer to trim the area on the car to be patched because I don’t have to go back and forth to the vise to secure the patch panel. Because we are trying to be precise here, I prefer to use a double cut burr to make the trim cuts.
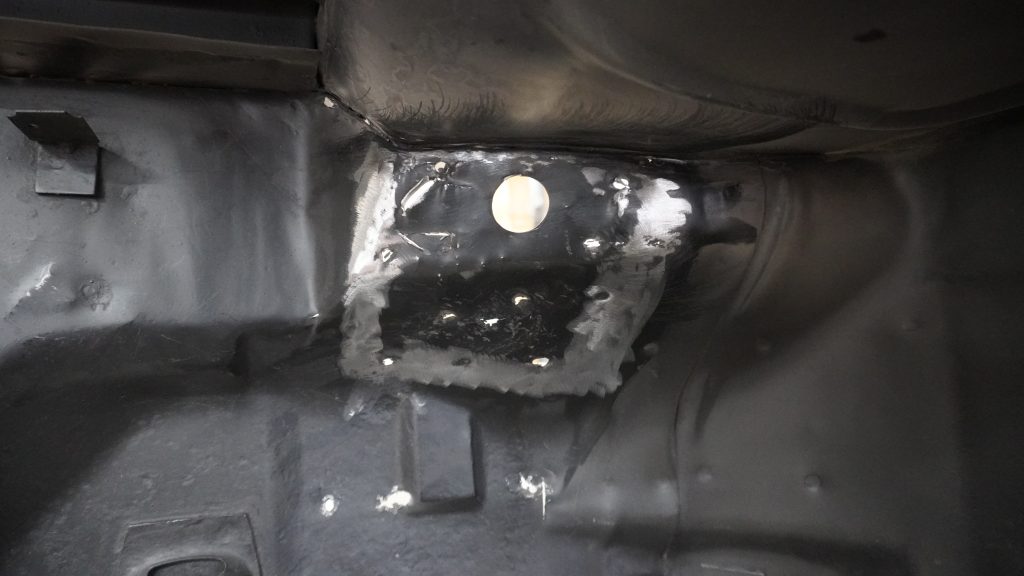
Finally it’s time to weld in your patch panel. Begin by tack welding it every inch or so, ensuring the metal is lined up evenly. You don’t want one side being higher or lower than the other. Doing so will make it difficult to clean up the welds, so spend as much time as needed here. If the patch panel moves while tacking it in place, making it impossible to line up the metal, you can use an air saw to create a nice thin gap to free it up. Once you have your patch panel tack welded, it’s time to weld it in solid. Do this by adding tacks to your existing tacks until all of the gaps are fully welded shut. Be sure to jump around to different areas and let the metal cool to avoid too much warpage.
Paint removed from area to be patched. 
Patch panel ready to be transferred to sheet metal. 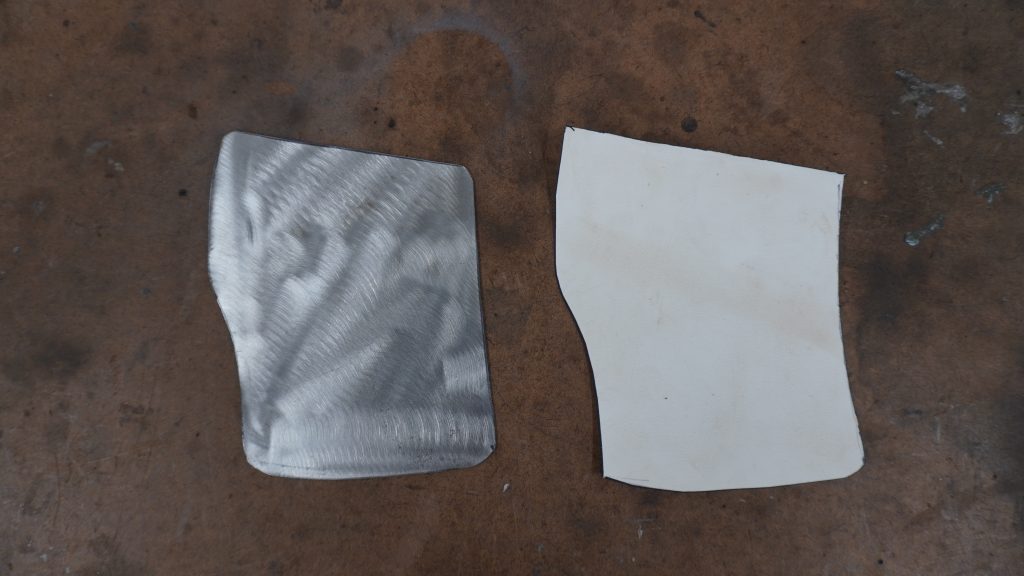
Patch panel cut out. 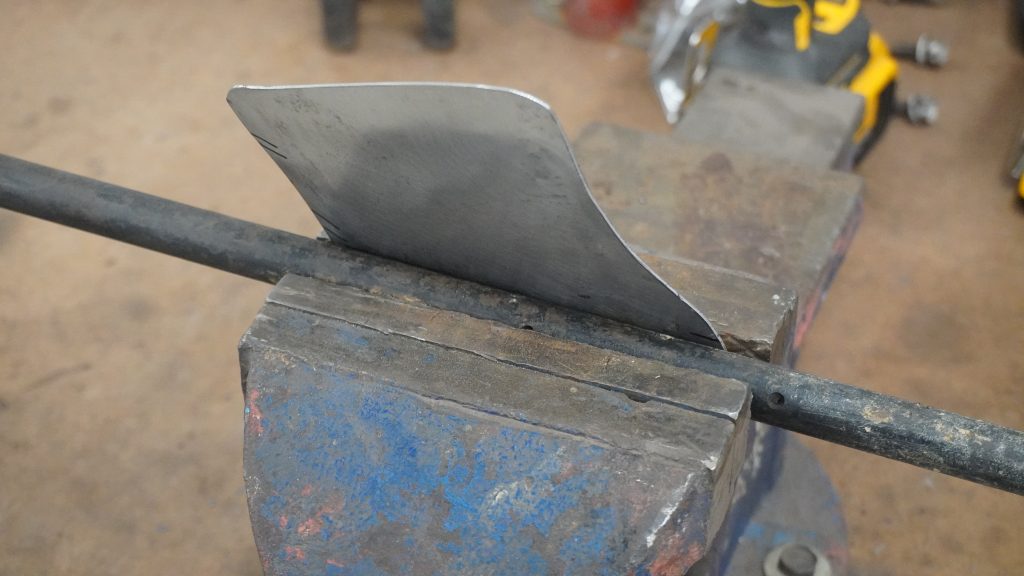
Making bend in patch panel using a concrete stake. 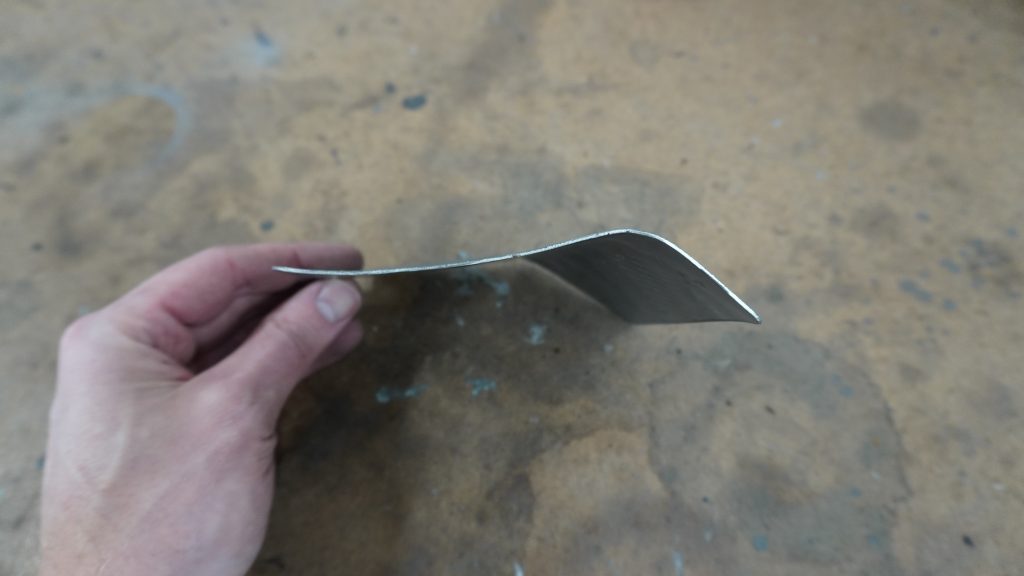
Patch panel beginning to take shape. 
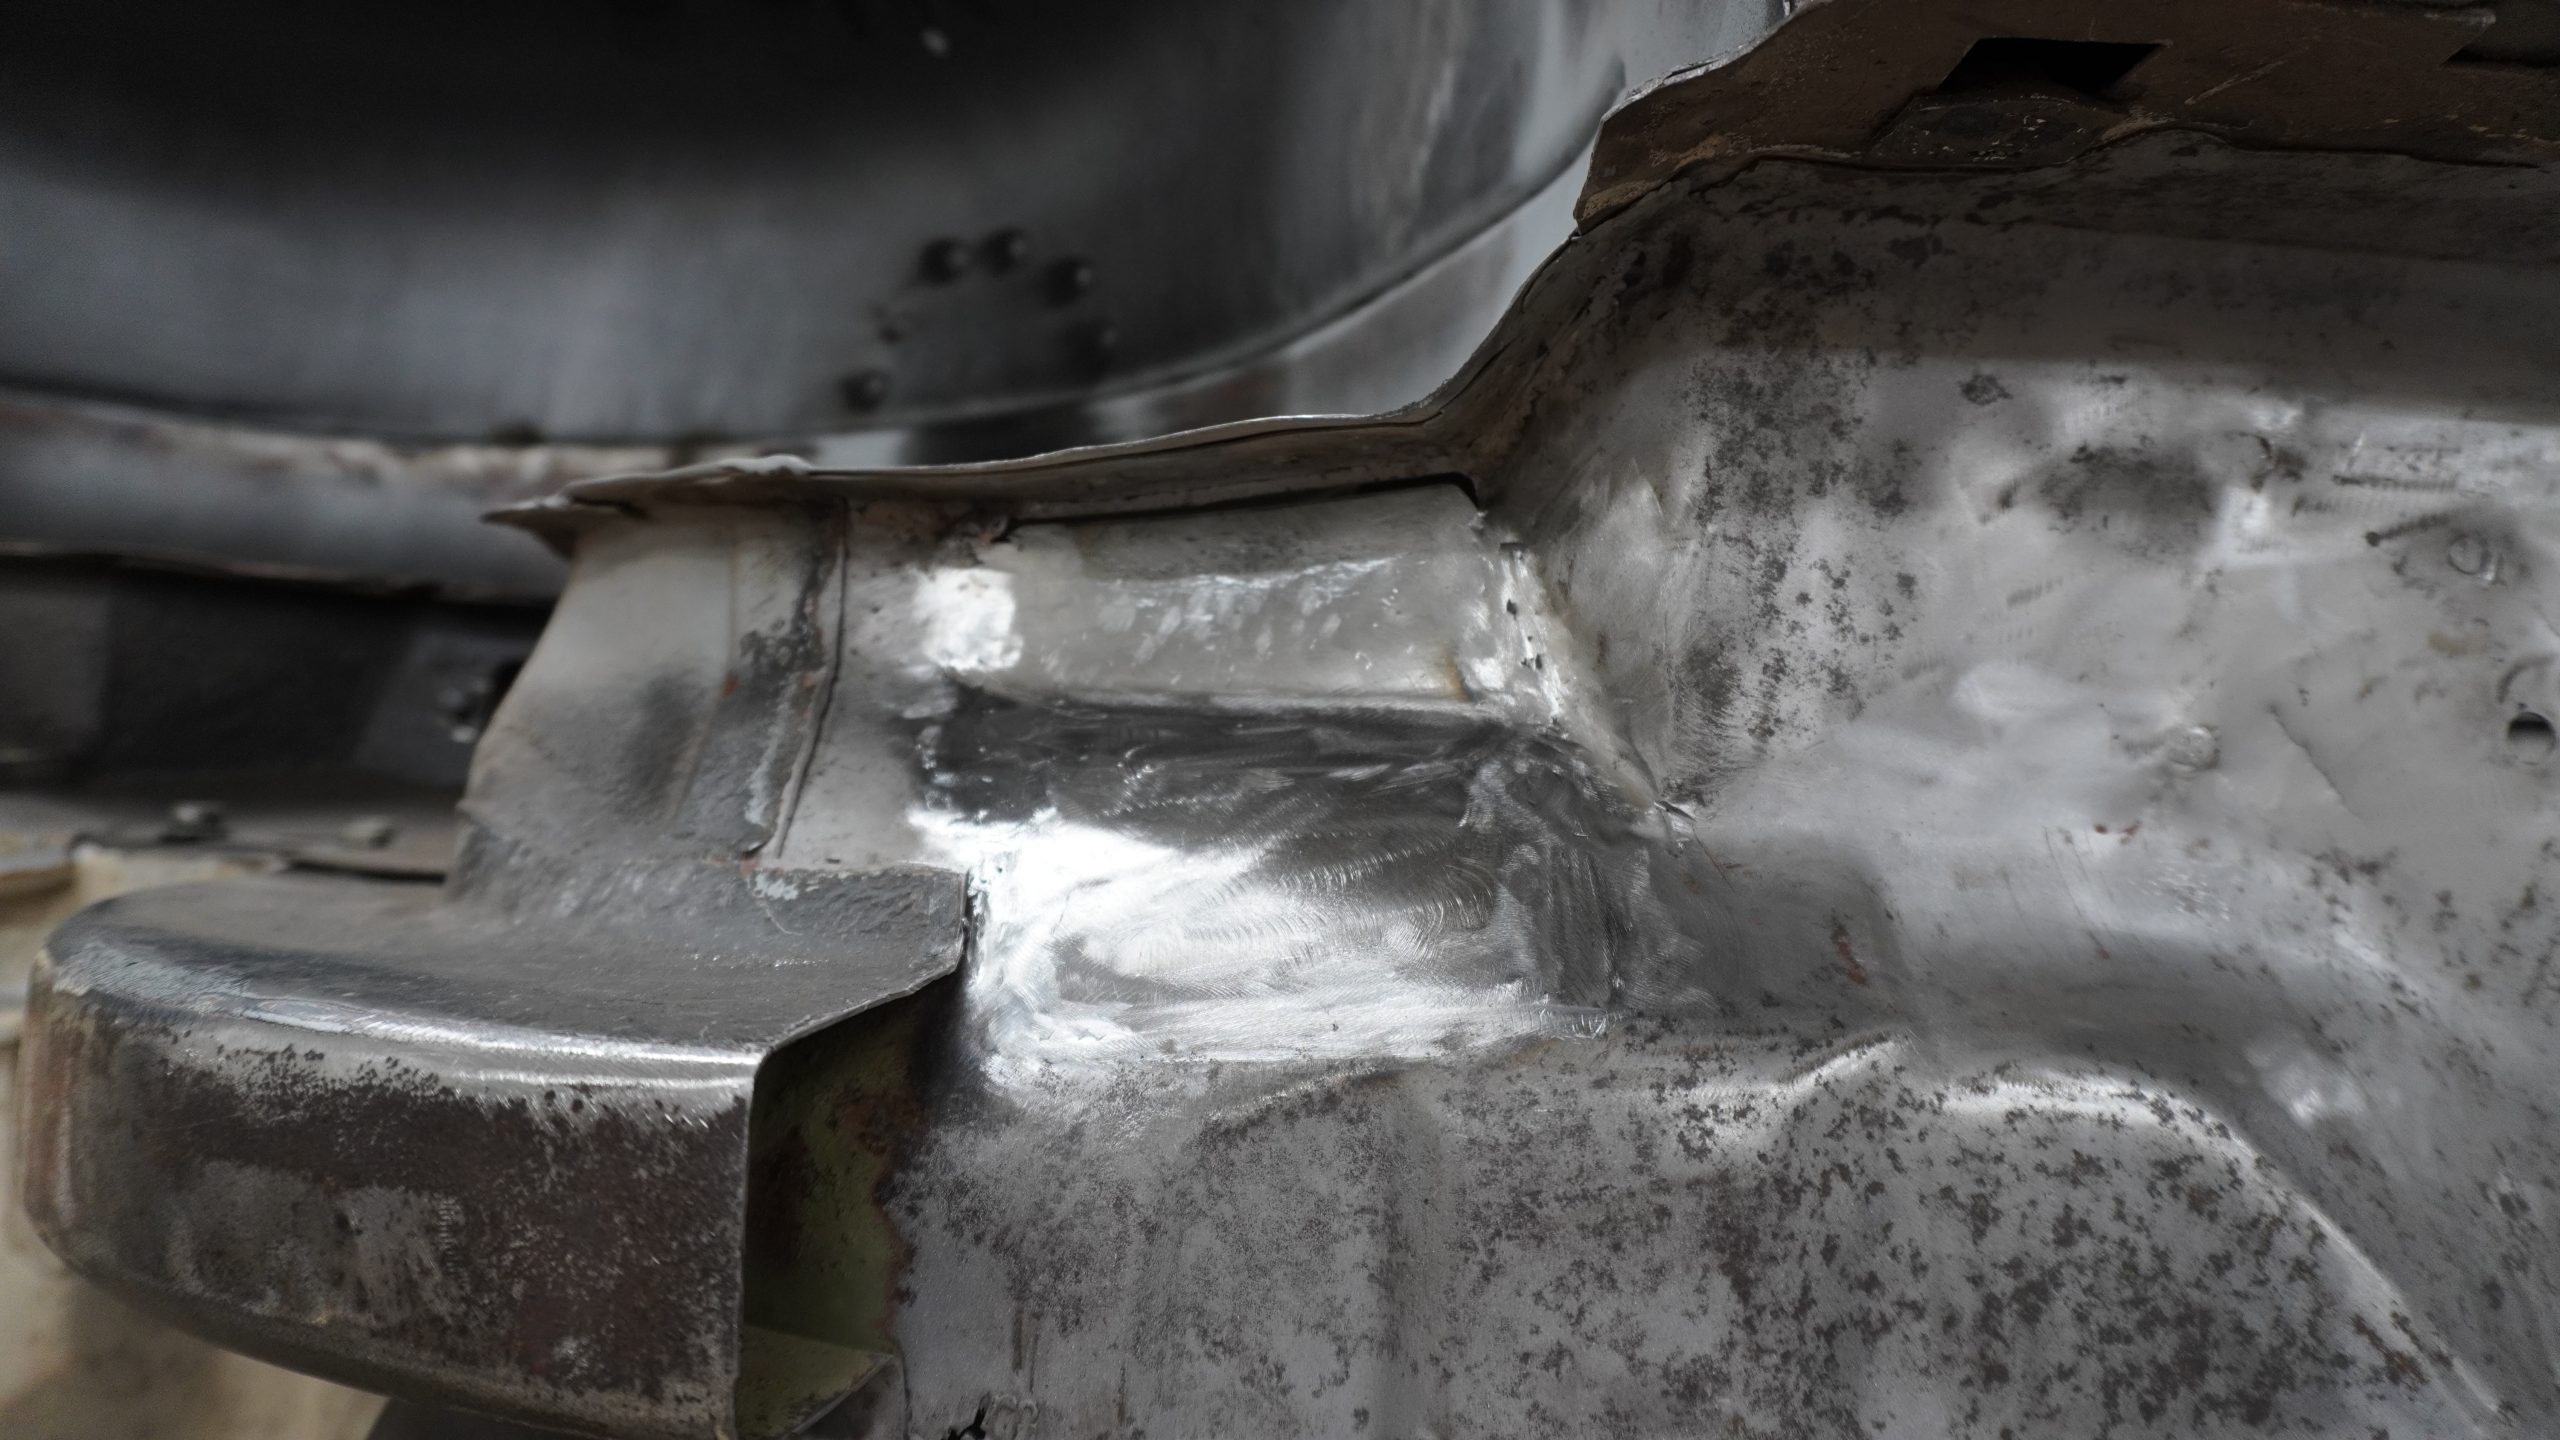
Patch panel welded in place.